





Draggin Bagger install & test ride

Thread Starter
|
Banned
Joined: Mar 2006
Posts: 8,603
Likes: 10
 Draggin Bagger install & test ride
this was an easy install for any of you with basic skills...as usual, i only looked at pics and didnt read any instructions, still easy...i did read RonH's post tho which helped lots...here's my pile of stuff

.first get the bike on a lift, take the seat and bags off, and then get the batt out...this was the biggest problem on the whole deal [:@] ...its big and heavy and stuffed in there, do this, on the carb side of the bike there's a loom right behind the oil fill cap goin up into the frame under the seat...if you look in there you'll see the bottom of the batt and can get a big screwdriver in there to work the batt up and disconnect the cables [8D] ...then i mounted the valve with the big fitting centered in the factory hole...like this

it looks like this on the other side

now i didnt bolt or screw the valve or the comp into the bike...i used 3M VHB double sided tape...it'll stick anything if prepped right...since i had some nice painted flat surfaces...i started the prep by wiping all surfaces with rubbin alchohol...see

then i loosed the clamp bolt on the comp so's i could clock it good cause once its stuck, it aint comin off and you aint gonna get in there to adjust it...so i made me some marks...but first had to move all those cables to give me some workin room....and this plug(dont know what it does but looks important), i just moved in front of the batt for good

cut it

and moved it here

.first get the bike on a lift, take the seat and bags off, and then get the batt out...this was the biggest problem on the whole deal [:@] ...its big and heavy and stuffed in there, do this, on the carb side of the bike there's a loom right behind the oil fill cap goin up into the frame under the seat...if you look in there you'll see the bottom of the batt and can get a big screwdriver in there to work the batt up and disconnect the cables [8D] ...then i mounted the valve with the big fitting centered in the factory hole...like this
it looks like this on the other side
now i didnt bolt or screw the valve or the comp into the bike...i used 3M VHB double sided tape...it'll stick anything if prepped right...since i had some nice painted flat surfaces...i started the prep by wiping all surfaces with rubbin alchohol...see
then i loosed the clamp bolt on the comp so's i could clock it good cause once its stuck, it aint comin off and you aint gonna get in there to adjust it...so i made me some marks...but first had to move all those cables to give me some workin room....and this plug(dont know what it does but looks important), i just moved in front of the batt for good
cut it
and moved it here
Thread Starter
|
Banned
Joined: Mar 2006
Posts: 8,603
Likes: 10
RE: Draggin Bagger install & test ride
here's the clockin in progress...ya wanna keep the loom from makin contact just in case it melts it...and you gotta make sure the side cover goes on

and the cheater marks(you oughta use em too )
)

me tapin the clamp...but first cinch it down and look at it...when you tighten it, it draws together and you want a flat surface so i had to persuade it some


here it is stuck in place with the loom wire tie'd on...also i moved the fuse box out of the way just to give me more room...make sure and double check everything before stickin cause IT AINT COMIN OFF

NOW...install the switch...at first i thought it was cheesy...it does handle 30amps but i wanted something on the bars or dash, i'll do that another day tho...there's two holes you could use in the plate behind the rear jug...one is easy to get to...one aint....i choose the easy one....an drilled it out to 1/2"

now to wire it...this is where i followed DB's instructions(well kinda)...i solder everything...when you solder, use flux and tin the ends before joinin em cause it works better...

and here's the finish product on wirin...it was easy too, except the damn batt so i reversed the take out process(it was the only time i had to have help, almost )
)

and the cheater marks(you oughta use em too
)me tapin the clamp...but first cinch it down and look at it...when you tighten it, it draws together and you want a flat surface so i had to persuade it some
here it is stuck in place with the loom wire tie'd on...also i moved the fuse box out of the way just to give me more room...make sure and double check everything before stickin cause IT AINT COMIN OFF
NOW...install the switch...at first i thought it was cheesy...it does handle 30amps but i wanted something on the bars or dash, i'll do that another day tho...there's two holes you could use in the plate behind the rear jug...one is easy to get to...one aint....i choose the easy one....an drilled it out to 1/2"
now to wire it...this is where i followed DB's instructions(well kinda
)...i solder everything...when you solder, use flux and tin the ends before joinin em cause it works better...and here's the finish product on wirin...it was easy too, except the damn batt so i reversed the take out process(it was the only time i had to have help, almost
)
Thread Starter
|
Banned
Joined: Mar 2006
Posts: 8,603
Likes: 10
RE: Draggin Bagger install & test ride
now to install the shocks and run the lines....when you put the valve on, put its line on then or you'll have a prob gettin to it later....here's where you can goof up ...ALWAYS cut your lines with a sharp razor at a 90 deg, dont haggle, dont smoosh em, or you'll have a leak...do it like this...forgot to load that pic cause it was hard to take a pic and cut at the same time and the pic sucked....before you reinstall the batt, poke the first line into the small outlet on the valve and run it up behind the frame and in front of the rear fender and then install the T

then put on the shocks...DO NOT DO THIS...in the instructions it says to lift the bike to full extension...well i have a table lift so i figured i could do one at a time...you can, but it'll bust your *** when you do...first one went on great...unscrew the cap on the shock and pull the packin pin(youll hear air whoosh out) and then you can compress em...put the air fitting on the shock towards the tire(its slightly cocked from the factory)....now for the other one [:-] ...i shoulda known when the threads got tight as it neared comin out, but NOOOO...i kept right on til i got it off and WHAM....no air in the other shock and it slammed down real low[ ] ...took two guys and still couldnt pick it up...too low to get a jack under...so i clamped one line shut and air'd the other shock up while my buds picked up the rear and i threaded it...fellas, save yourself the trouble, get a jack under it before you take em off ....one prob here on install tho...the dockin hardware didnt get along with the larger shock eye...so i trimmed it some, like this


here it is at stock height with stock shocks

here it is slammed

and full extension

then put on the shocks...DO NOT DO THIS...in the instructions it says to lift the bike to full extension...well i have a table lift so i figured i could do one at a time...you can, but it'll bust your *** when you do...first one went on great...unscrew the cap on the shock and pull the packin pin(youll hear air whoosh out) and then you can compress em...put the air fitting on the shock towards the tire(its slightly cocked from the factory)....now for the other one [:-] ...i shoulda known when the threads got tight as it neared comin out, but NOOOO...i kept right on til i got it off and WHAM....no air in the other shock and it slammed down real low[
] ...took two guys and still couldnt pick it up...too low to get a jack under...so i clamped one line shut and air'd the other shock up while my buds picked up the rear and i threaded it...fellas, save yourself the trouble, get a jack under it before you take em off ....one prob here on install tho...the dockin hardware didnt get along with the larger shock eye...so i trimmed it some, like thishere it is at stock height with stock shocks
here it is slammed
and full extension
Thread Starter
|
Banned
Joined: Mar 2006
Posts: 8,603
Likes: 10
RE: Draggin Bagger install & test ride
howz it ride yall wanna know....very well...i noticed it will let you know if there aint enuff air cause you'll bottom on bumps...put more air in....and what i thought was the cheesy location for the switch is actually very easy to find on the fly....if you aint careful you will burn your hand(on the top no less) when your feet are on the ground, but on the fly adjustments are a snap....the shocks have more travel both up and down and there's a sweet spot to ride in...it'll be different for everyone and loaded, two up, or unloaded so play with it....one note on the comp and valve tho...it has the dump integrated on the valve which is better IMO than Progressive's AirTail system...so it only pumps up, the switch has three positions, neutral, up, & dump....comp only works on the up(install it correctly unlike me [:@])..yep, i gotta push mine down to make it go up and i aint takin it apart to fix it....it feels as just like the factory shock ride when they were new BUT, with the extra travel, the ride is what a GLIDE should be...it does glide when its in the sweet spot...the sweet spot is broad so you can run low with it if you want and dumped plum empty it will ride just fine but bumpy....i felt no pogo action as the rebound on the shock arrested any of that....slammed with the kickstand down has not yet gimme the jeebs about it fallin...i like the system, glad i jumped on the first wave....for those of you here in the metro area, i'll help you with yours..i got lots of tape left....Tony is interested in how it holds up, so i'm the test case....well thats bout it, now yall know [8D]


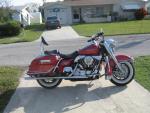
oh, check out my new dash pad...once i seen eddybo's i had to have one too

[8D]oh, check out my new dash pad...once i seen eddybo's i had to have one too
Road Captain
Joined: Jun 2006
Posts: 720
Likes: 6
From: South Jersey
RE: Draggin Bagger install & test ride
Thanks for the install instructions. This is my next purchase. Seems pretty easy.
Trending Topics

Seasoned HDF Member


Joined: Jun 2006
Posts: 28,552
Likes: 3,954
From: Vermont
HD Forum Stories
The Best of Harley-Davidson for Lifelong Riders

7 Surprising Harley-Davidson Products that Are Not Motorcycles
Verdad Gallardo
8 Best Harley-Davidson Motorcycles Ever
Pouria Savadkouei
10 Worst Harley-Davidson Motorcycles Ever
Pouria Savadkouei
Killer Custom's Jail Break Is The Breakout That Refused to Blend In
Verdad Gallardo
Crazy Bunderbike Build Looks Amazing, But Is It Impossible to Ride?
Verdad Gallardo
Harley-Davidson Reveals Super Cool Cafe Racer Concept
Verdad Gallardo
Engraved Rebellion: Inside Bundnerbike's Glam Rock II
Verdad Gallardo
10 Motorcycles You Should Never Buy
Joe Kucinski
10 Things Harley-Davidson Needs to Fix in 2026
Verdad Gallardo
Cruiser
Joined: Aug 2006
Posts: 142
Likes: 0
From:
RE: Draggin Bagger install & test ride
Hey Bryan,
Sorry about the bike coming down, man that had to stink. We do use jacks even on a table lift. First, I would like to say thanks for your patience and we appreciate your post. I can tell you spent alot of time presenting these photos and am sure that other forum members learned more from you and RonH than from me... I would like to use some photos for our website of you in your white suit (just kidding) just you and your ride. Can you snap one and send it to me via email. Can we put it on our site? You can spin your switch very easily, loosen the lock ring, or I can tell you how to switch two wires and bam up will be up... As far as the switch mounting, we use a dremel tool with a 90 degree head or a right angle drill and do it from the motor side, it really only needs to be expanded from 1/4" to 1/2", we use the outside hole that way it is as far to the outside of frame area to prevent the pipe from being near your hand... Well forum members I hope DI75 shows up to read this post... BRYAN TTM IS DRAGGIN!!! Bike looks real good, try to get your race car in your photo for me if it is near...
Thanks,
Tony
Let me know if you need anything....
www.dragginbaggers.com
Sorry about the bike coming down, man that had to stink. We do use jacks even on a table lift. First, I would like to say thanks for your patience and we appreciate your post. I can tell you spent alot of time presenting these photos and am sure that other forum members learned more from you and RonH than from me... I would like to use some photos for our website of you in your white suit (just kidding) just you and your ride. Can you snap one and send it to me via email. Can we put it on our site? You can spin your switch very easily, loosen the lock ring, or I can tell you how to switch two wires and bam up will be up... As far as the switch mounting, we use a dremel tool with a 90 degree head or a right angle drill and do it from the motor side, it really only needs to be expanded from 1/4" to 1/2", we use the outside hole that way it is as far to the outside of frame area to prevent the pipe from being near your hand... Well forum members I hope DI75 shows up to read this post... BRYAN TTM IS DRAGGIN!!! Bike looks real good, try to get your race car in your photo for me if it is near...
Thanks,
Tony
Let me know if you need anything....
www.dragginbaggers.com

Ultimate HDF Member
Joined: Nov 2005
Posts: 5,256
Likes: 5
From: Concord, CA
RE: Draggin Bagger install & test ride
Wish there was a 'draggin softies' 
As usual, great detail! This should get put in the DIY, minus our responses of course.
Enjoy! Oh, hey... is it strange going up and down while moving or is it a gradual thing that just stiffens/softens? I picture it like hydraulics and moving quickly
As usual, great detail! This should get put in the DIY, minus our responses of course.
Enjoy! Oh, hey... is it strange going up and down while moving or is it a gradual thing that just stiffens/softens? I picture it like hydraulics and moving quickly