


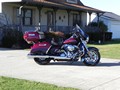

18 lowrider owners

Road Master
Joined: Aug 2018
Posts: 965
Likes: 297
From: NoVa

Gotta agree. I like chrome a LOT, but the black bits set off the bright bits nicely. Love the smoke blue or whatever color they call that version paint scheme.

Cruiser
Joined: May 2018
Posts: 178
Likes: 47
From: montecello
I am planning on installing some Paul Yaffe 6 inch monkey sport bars next weekend ,and would like to know if you have to remove the connectors on the ends of the wiring so I can slide them throught the bar ,also I will be relocating the signals to the forks, so those are wires that I dont have to run through the bars , any tips are greatly apriciated .

Seasoned HDF Member


Joined: Feb 2009
Posts: 5,642
Likes: 1,985
From: Cleveland Zoo
I am planning on installing some Paul Yaffe 6 inch monkey sport bars next weekend ,and would like to know if you have to remove the connectors on the ends of the wiring so I can slide them throught the bar ,also I will be relocating the signals to the forks, so those are wires that I dont have to run through the bars , any tips are greatly apriciated .
On my Low Rider I lifted the front of the tank to get at all the plugs. Pull the main fuse so you don't cause codes, which might happen anyway, just clear them.
Are you changing grips, the old left grip is a pain to get off but doable.

Road Master


Joined: Apr 2018
Posts: 1,215
Likes: 595
From: Living in a van down by the river
What OldMike said. I Googled those bars, with the 90 degree angles you'll definitely want to remove the connectors. Just be sure to make drawings and/or take pictures before pulling them so you'll know for sure how to re-pin them.
The TBW connector has 6 wires, 2 red, 2 white and 2 black. One red, black and white have a blue sleeve around them. Those 3 go in the side of the connector with the latch. Get 'em backwards and the TBW will be hosed.
Go to Lowes, get cable pulling lube and use plenty of it. It'll really make the cables slick and a bit easier to pull and it will dry over time.
Good plan on relocating the turn signals, as you said one less cable to pull on each side.
I put 10" mini apes on mine. Wire harness length was ok but I put on 2" longer brake line and clutch cable, 37" clutch and 42" brake. With 6" bars you should be ok with what you've got.
The TBW connector has 6 wires, 2 red, 2 white and 2 black. One red, black and white have a blue sleeve around them. Those 3 go in the side of the connector with the latch. Get 'em backwards and the TBW will be hosed.
Go to Lowes, get cable pulling lube and use plenty of it. It'll really make the cables slick and a bit easier to pull and it will dry over time.
Good plan on relocating the turn signals, as you said one less cable to pull on each side.
I put 10" mini apes on mine. Wire harness length was ok but I put on 2" longer brake line and clutch cable, 37" clutch and 42" brake. With 6" bars you should be ok with what you've got.
Cruiser
Joined: May 2018
Posts: 178
Likes: 47
From: montecello
Learn the de-pinning procedure and use it, going to make it all easier, especially putting the wires in the new bars. I would have the new bars in hand and do the switch one side at a time.
On my Low Rider I lifted the front of the tank to get at all the plugs. Pull the main fuse so you don't cause codes, which might happen anyway, just clear them.
Are you changing grips, the old left grip is a pain to get off but doable.
On my Low Rider I lifted the front of the tank to get at all the plugs. Pull the main fuse so you don't cause codes, which might happen anyway, just clear them.
Are you changing grips, the old left grip is a pain to get off but doable.
What OldMike said. I Googled those bars, with the 90 degree angles you'll definitely want to remove the connectors. Just be sure to make drawings and/or take pictures before pulling them so you'll know for sure how to re-pin them.
The TBW connector has 6 wires, 2 red, 2 white and 2 black. One red, black and white have a blue sleeve around them. Those 3 go in the side of the connector with the latch. Get 'em backwards and the TBW will be hosed.
Go to Lowes, get cable pulling lube and use plenty of it. It'll really make the cables slick and a bit easier to pull and it will dry over time.
Good plan on relocating the turn signals, as you said one less cable to pull on each side.
I put 10" mini apes on mine. Wire harness length was ok but I put on 2" longer brake line and clutch cable, 37" clutch and 42" brake. With 6" bars you should be ok with what you've got.
The TBW connector has 6 wires, 2 red, 2 white and 2 black. One red, black and white have a blue sleeve around them. Those 3 go in the side of the connector with the latch. Get 'em backwards and the TBW will be hosed.
Go to Lowes, get cable pulling lube and use plenty of it. It'll really make the cables slick and a bit easier to pull and it will dry over time.
Good plan on relocating the turn signals, as you said one less cable to pull on each side.
I put 10" mini apes on mine. Wire harness length was ok but I put on 2" longer brake line and clutch cable, 37" clutch and 42" brake. With 6" bars you should be ok with what you've got.
Seasoned HDF Member
Joined: Feb 2009
Posts: 5,642
Likes: 1,985
From: Cleveland Zoo
yes I am putting on new grips as well ,thanks for the advice on lifting the tank ,I was planning on disconnecting the battery , so as not to get a short , as for the codes I will do just that and clear them .
thanks I will be taking a lot of pics , my main concern is not taking the pins off it was installing the pins on the correct way,but I guess I have to be extra careful and take my time , I like doing my own work but when it comes to electronics , that stuff gives me anxiety,,lolthanks again guys
thanks I will be taking a lot of pics , my main concern is not taking the pins off it was installing the pins on the correct way,but I guess I have to be extra careful and take my time , I like doing my own work but when it comes to electronics , that stuff gives me anxiety,,lolthanks again guys
It's easy.

Club Member


Joined: Dec 2014
Posts: 10,734
Likes: 3,755
From: SWFL

Photos of everything. The biggest challange is the TBW connector. I have yet to depin one where I didn't F it up. So now I just buy a new connector so when I depin, I toss the old one and use the new one. Every other connector is a piece of cake. Also on the TBW. There are six wires, two identical sets of three. Two red, two white and two black. Makes it nice and easy to screw up the order. I mark one set of three (the side of the latch) that way I know I've got the right three. I made a post on the subject with photos, somewhere...
Road Master
Joined: Apr 2018
Posts: 1,215
Likes: 595
From: Living in a van down by the river
yes I am putting on new grips as well ,thanks for the advice on lifting the tank ,I was planning on disconnecting the battery , so as not to get a short , as for the codes I will do just that and clear them .
thanks I will be taking a lot of pics , my main concern is not taking the pins off it was installing the pins on the correct way,but I guess I have to be extra careful and take my time , I like doing my own work but when it comes to electronics , that stuff gives me anxiety,,lolthanks again guys
thanks I will be taking a lot of pics , my main concern is not taking the pins off it was installing the pins on the correct way,but I guess I have to be extra careful and take my time , I like doing my own work but when it comes to electronics , that stuff gives me anxiety,,lolthanks again guys
For me the electrical work was mostly a non-event but trying to figure out what length upper clutch cable I needed gave me fits.
Oh yeah, also much easier pulling the 40 amp fuse than trying to get down to that negative battery cable, it's buried so deep under the shock absorber. I also fully removed my tank; just got it out of my hair and didn't have to worry about a scratch. That also gave me a chance to clean up under there and put a coat of wax on stuff that never sees the light of day but does gather dirt and muck.
HD Forum Stories
The Best of Harley-Davidson for Lifelong Riders

7 Surprising Harley-Davidson Products that Are Not Motorcycles
Verdad Gallardo
8 Best Harley-Davidson Motorcycles Ever
Pouria Savadkouei
10 Worst Harley-Davidson Motorcycles Ever
Pouria Savadkouei
Killer Custom's Jail Break Is The Breakout That Refused to Blend In
Verdad Gallardo
Crazy Bunderbike Build Looks Amazing, But Is It Impossible to Ride?
Verdad Gallardo
Harley-Davidson Reveals Super Cool Cafe Racer Concept
Verdad Gallardo
Engraved Rebellion: Inside Bundnerbike's Glam Rock II
Verdad Gallardo
10 Motorcycles You Should Never Buy
Joe Kucinski
10 Things Harley-Davidson Needs to Fix in 2026
Verdad Gallardo
Cruiser
Joined: May 2018
Posts: 178
Likes: 47
From: montecello
Photos of everything. The biggest challange is the TBW connector. I have yet to depin one where I didn't F it up. So now I just buy a new connector so when I depin, I toss the old one and use the new one. Every other connector is a piece of cake. Also on the TBW. There are six wires, two identical sets of three. Two red, two white and two black. Makes it nice and easy to screw up the order. I mark one set of three (the side of the latch) that way I know I've got the right three. I made a post on the subject with photos, somewhere...
Just go slow, check and double-check. I could find a link if you need it but Ryan Urlacher has some excellent you tube video's on depinning and piinning, pulling cables etc. Just lay each connector on a table, latch side up, write on a piece of masking tape which connector it is and snap a pic from the backside of the connector. I also drew a pic of the end of each connector and labelled the color of each wire. Then when you repin hold each connector latch side up and put the colors back the same as the pic. When re-pinning be sure you hear a little click when you insert the pin then give it a gentle tug after inserting the pin to insure it's locked. You'll be fine.
For me the electrical work was mostly a non-event but trying to figure out what length upper clutch cable I needed gave me fits.
Oh yeah, also much easier pulling the 40 amp fuse than trying to get down to that negative battery cable, it's buried so deep under the shock absorber. I also fully removed my tank; just got it out of my hair and didn't have to worry about a scratch. That also gave me a chance to clean up under there and put a coat of wax on stuff that never sees the light of day but does gather dirt and muck.
For me the electrical work was mostly a non-event but trying to figure out what length upper clutch cable I needed gave me fits.
Oh yeah, also much easier pulling the 40 amp fuse than trying to get down to that negative battery cable, it's buried so deep under the shock absorber. I also fully removed my tank; just got it out of my hair and didn't have to worry about a scratch. That also gave me a chance to clean up under there and put a coat of wax on stuff that never sees the light of day but does gather dirt and muck.