When you click on links to various merchants on this site and make a purchase, this can result in this site earning a commission. Affiliate programs and affiliations include, but are not limited to, the eBay Partner Network.
Dyna Glide ModelsSuper Glide, Super Glide Sport, Super Glide Custom, Dyna Glide Convertible, Super Glide T-Sport, Dyna Glide Police, Dyna Switchback, Low Rider, Street Bob, Fat Bob and Wide Glide.
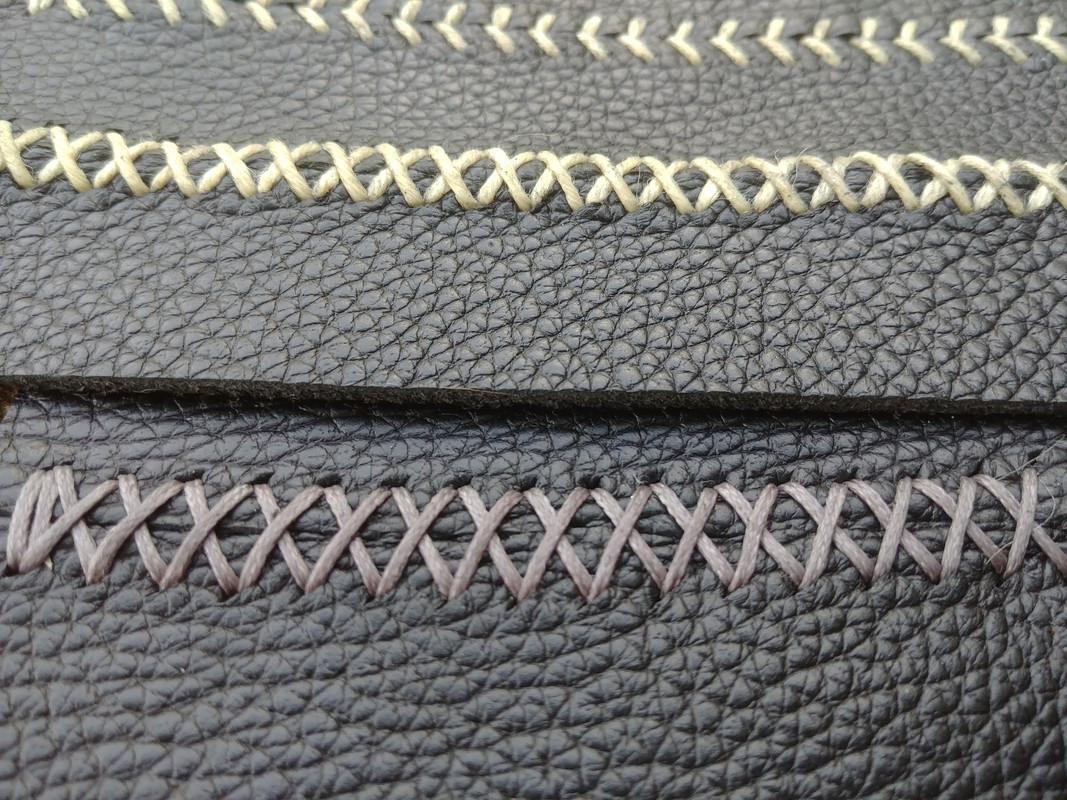
I ordered some 1 mm "space gray" (and black, just in case) super high quality thread. Comes out of Germany, which I find odd for some reason. Supposed to be one of the nicest UV-stable braided poly threads available. I wanted something slick and shiny. The Tandy cords I was testing were OK but even the poly cord was a bit dull and coarse compared to what I had in mind. I'm over-thinking, I know, but it's my nature.
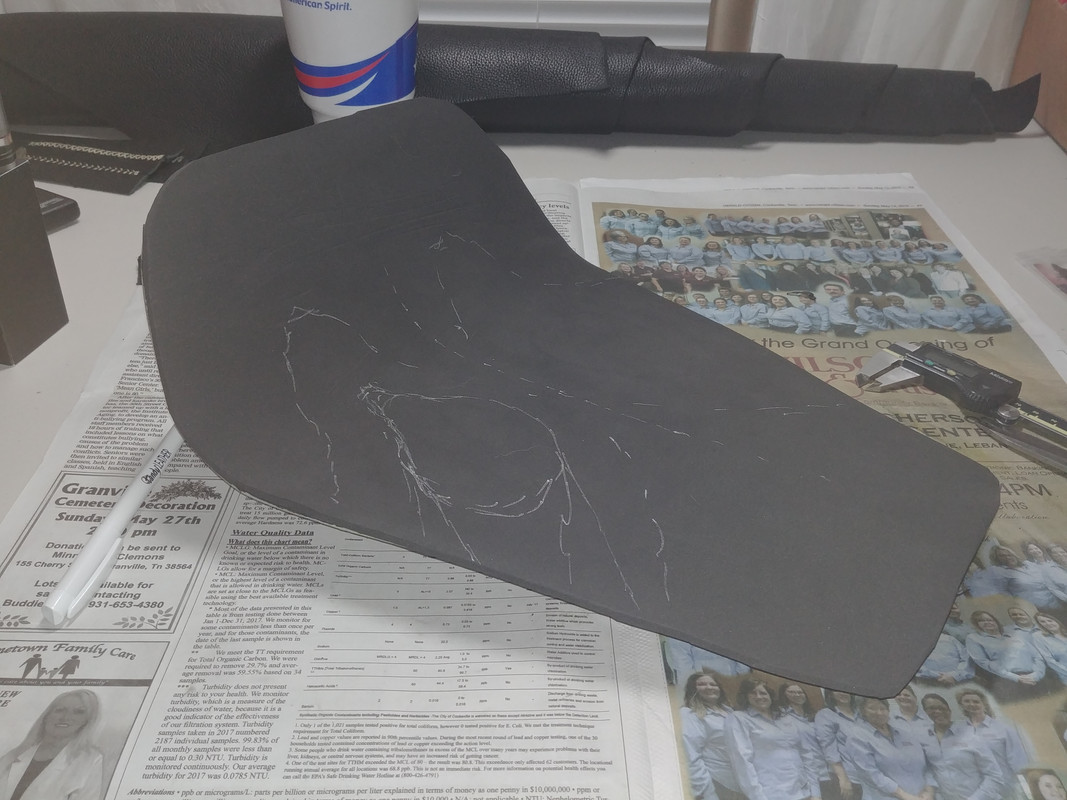
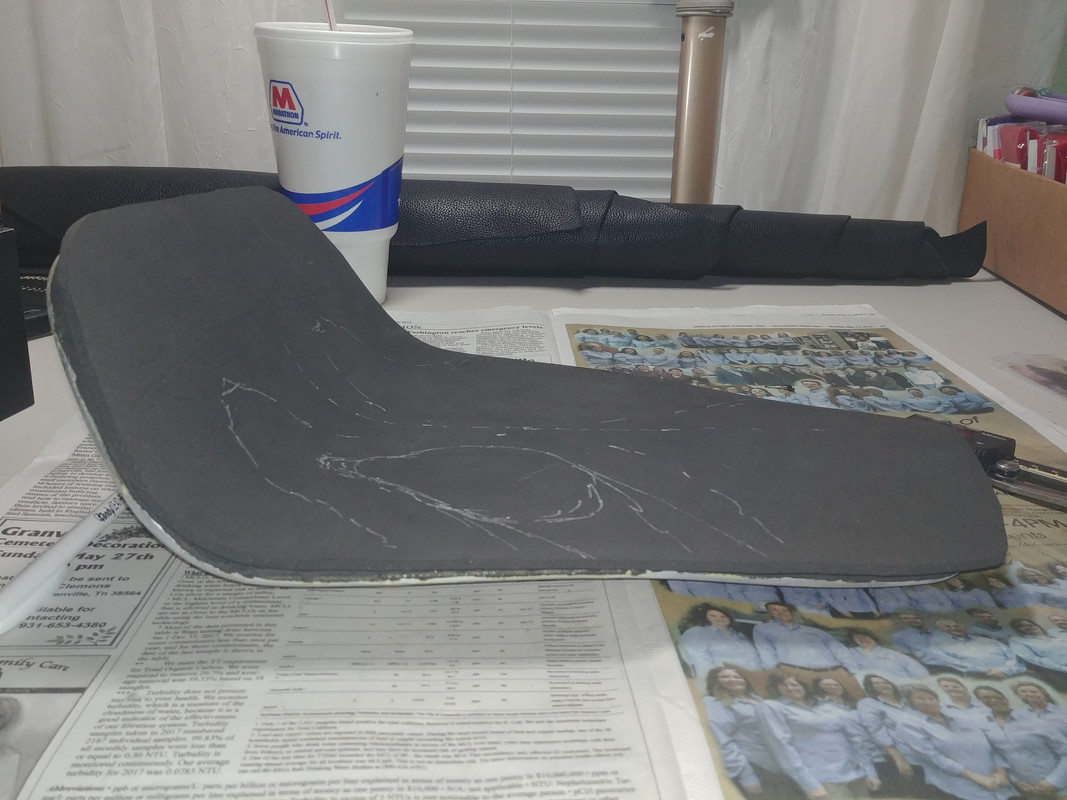
Over the next couple days I'll glue up and shape the foam, then make the leather cutting pattern.
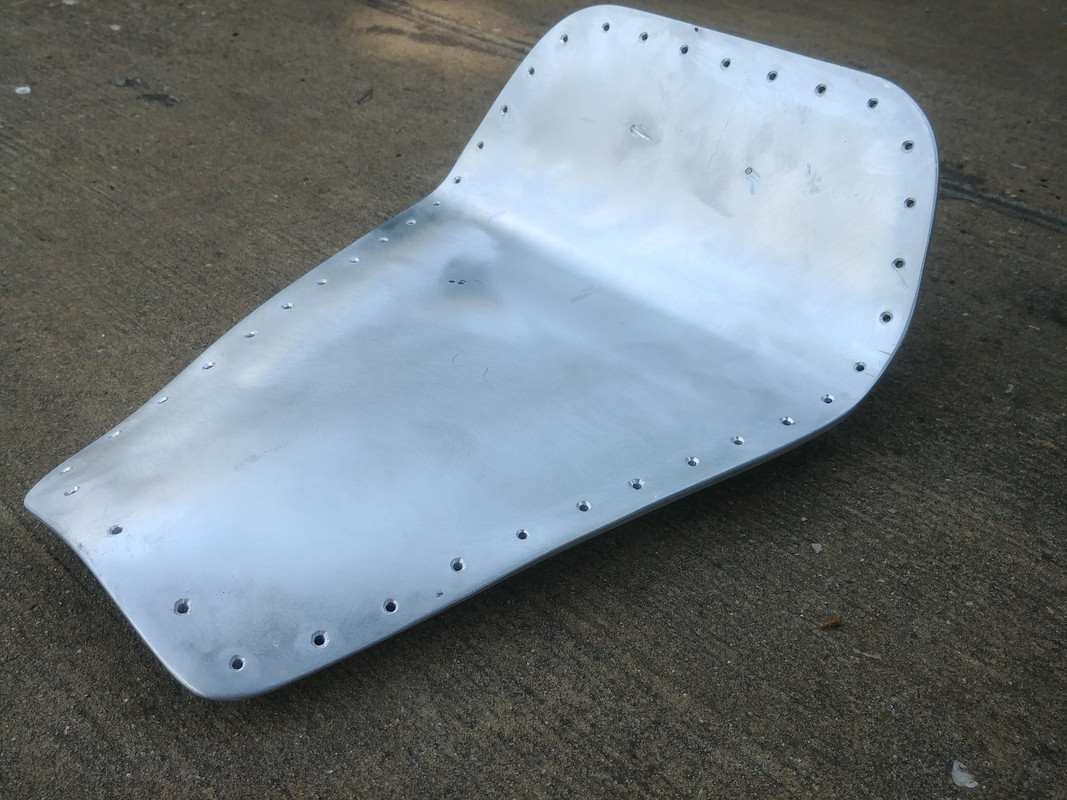
160 amps isn't nearly enough to fillet weld 1/4" aluminum plate. Would have been better off brazing it but whatever. Done now. The welds are embarrassing but they're solid as hell. They're hidden anyway, so I'm not worried about it.
Oh, and don't wear sneakers when welding... I got a real nice burn below my ankle where some slag fell into my shoe. Ouch.
Obligatory pics...
The burn...
Rivet holes chamfered, edges eased, top and bottom brushed and cleaned...
Nasty welds...
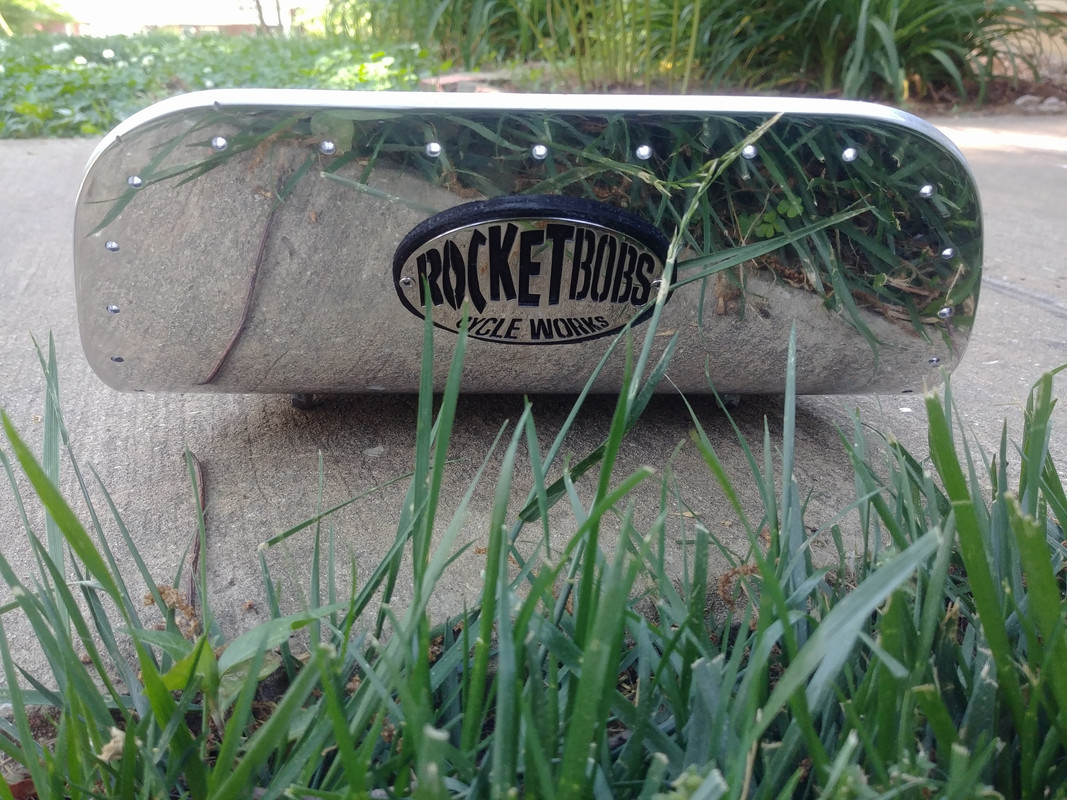
Back polished and Pete's medallion mounted...
Comparing threads and stitches...
This German cord is SO much nicer. I'm a happy camper...
Last edited by cggorman; May 13, 2018 at 04:07 PM.
Here's a tip for your hand stitching, get yourself a resin block, (Tandy Leather or any decent crafts shop should have) and run your thread over it before stitching.
It will do 3 things for you.
1. Add to life and durability of the thread,
2. The resin sticks to itself as you stitch, so when stitches cross over the resin binds the the two stitches in place and holds them while you do the next stitch, so you don't have to continually go back a stitch or 2 and pull them taut again. HUGE timesaver.
3 Because the stitches bind to themselves, you don't need to keep the thread constantly taut as you go which will save your hands a lot pain.
Thanks for the tips. I do have a block of beeswax from Tandy. The thread I'm using is pre-waxed tho. It holds nice. Just sticky enough without picking up too much lint and loose leather fibers.
I'm going with the Space Gray Tiger thread. I didn't care for the cream color or the linen thread.
That gray sample I pictured was a quick and dirty trial. My holes weren't as nicely aligned as I'm capable. I just wanted to verify the thread choice.
I'm doing three layers of foam and I'm waiting a day or so between layers to let the cement set up. Once that's done I'll play with pattern making. Nothing fancy. I'm expecting 3 pieces.
Pre waxed threads are great, but the resin adds a little more tack to the thread and make stitching noticeably easier.
If you wanna get real creative, cut your leather pieces about an inch over size, skive the edges (i.e. take an insanely sharp knife and feather out the leather), then fold the edge and glue it down before making your holes. The edges will mate together better and look awesome. Plus there is more meat in the join and strength
If you're using 1 mm thread, the 3 mm multi tongue Awls you have are making too big a hole. See if you can get a 2mm or 1.5., or bump up to 2mm to 2.5mm thread.
I'm out of state right now (house sitting for family) but I'll see if I can find a place near here with leatherworking tools. I'm not super thrilled with the punching tools and don't want heavier thread so replacements sound like a good idea.
I was considering skiving the two side panels where they join fore and aft so I could do a flat felled stitch there. I hadn't considered skiving the whole thing. I may play with that.
The cross stitch is really secure and doesn't show hardly any of the cut edge but I do like the idea of a finished edge regardless.
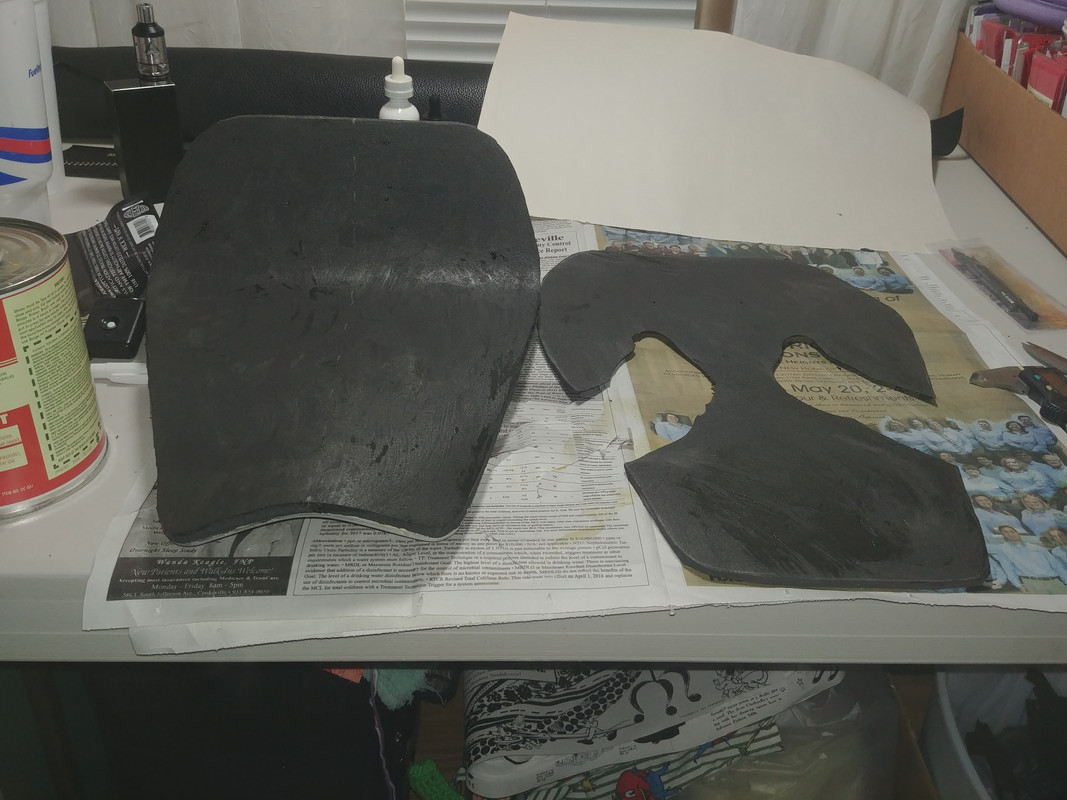
Ya gonna need another foam layer between the base and the one you cut out.
The cut outs you've made will let yer boney *** sit under pressure on the bottom layer, so you'll still end up with a sore ***.
Put a half thickness layer of foam that is a little more softer than the base and top layer, no cut outs.
Alternatively, Cut a new top layer, glue it down, then sand/grind out the pressure areas, limit the depth of the sanding to just above the base layer.
More laborious I know, but much better result in the end..... Pun intended.
7 Surprising Harley-Davidson Products that Are Not Motorcycles
Slideshow: The bar-and-shield logo shows up on far more than motorcycles, some of the company's most unexpected products have nothing to do with riding.
Slideshow: From the troubled AMF years to modern misfires, these bikes earned reputations for reliability issues, questionable engineering, or disappointing performance.
Crazy Bunderbike Build Looks Amazing, But Is It Impossible to Ride?
Slideshow: The Swiss custom shop has taken a Harley Softail and stretched it into something so long and low that it looks closer to a rolling sculpture than a conventional motorcycle.
Engraved Rebellion: Inside Bundnerbike's Glam Rock II
Slideshow: A standard cruiser becomes an intricate metal canvas in the hands of a Swiss custom house known for pushing Harley-Davidson platforms far beyond their factory brief.