


Help w/ connections on a relay for aux or fog lights

Thread Starter
|
Tourer
Joined: Oct 2011
Posts: 265
Likes: 101
From: Spokane, WA
I've search for a diagram that would help with the four connections on the relay I bought to use with the installation of so driving lights to add to the low rider. I keep finding the same diagrams in the threads but they do not show what wires are connected to the relay itself. I picked up a 12v / 40 amp relay w/ four connections on it to use with some driving lights. I was planning on hooking them up so they are on when the low beam is on and off when High beam comes on. Anyways I copied the diagram from the H.D. Fog Lamp Kit instructions and it happens to be the same one floating around the forum. I am not sure if I have the right connections to the relay. I also don't want to fry anything if I connect it up wrong or just go randomly test it out until it works or I see smoke. I was hoping someone has some knowledge about them and can let me know. I added what was on my relay to the top of the picture below (no other instruction of diagrams came with it). I took a guess and added the relays number to the wires I guessed would work. Did I come close to getting it right?

Road Warrior
Joined: Apr 2010
Posts: 1,739
Likes: 10
From: Suffolk, England
You should be able to work it out if you have a multimeter. Just two of the contacts will pass current, these will be the coil (86&85 on your diagram). The other two will be the contacts (30&87). Won't matter which way around you connect the pairs.
Here you go, Gee....
Edit to rectify previous diagram & text: did some more research....previous diagram seemed to be wrong....some relays have a diode....here's how to connect the wiring (using a switch & fuse):
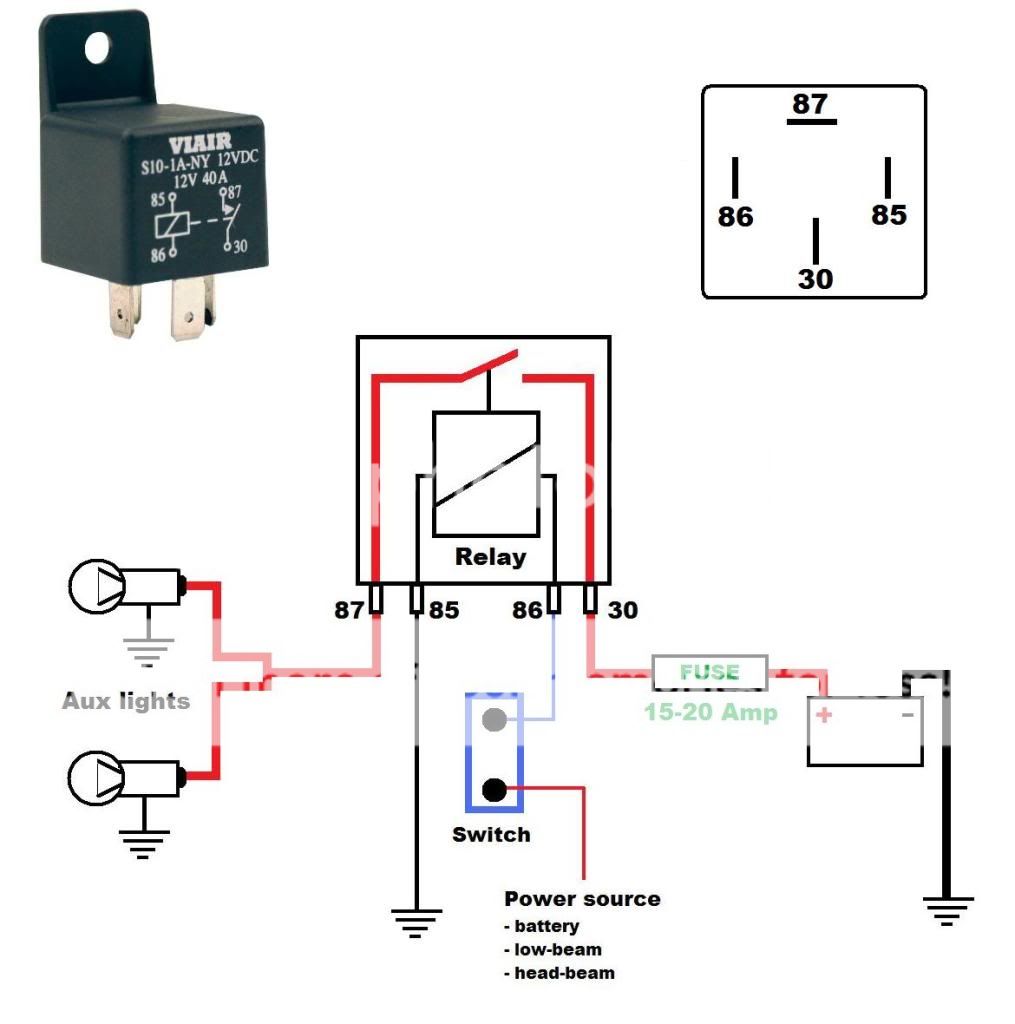
Signal current from switch (86 ==> 85) activates coil; coil activates internal relay switch (30 ==> 87)
30 = + from battery (requires mim 2.5 mm2 wire)
87 = + to lamps (requires mim 2,5 mm2 wire)
86 = + from switch or headlight wire (to activate relay)
85 = ground
Last edited by FXD2003Rider; Nov 9, 2011 at 07:15 AM. Reason: diagram rectification
Extreme HDF Member
Joined: Sep 2006
Posts: 10,114
Likes: 29
From: Vancouver B.C. Canada
Gee, 4 terminals relay is easy to hook up, think about 2 circuits, one power and the other switch. I always use 30 as power fused to the battery positive, 87 is wired to your device, accessories, fog light etc. 85 and 86 is basically an on/off switch, it is a solenoid, 85 is ground and 86 is the control side, it can be wired to a toggle switch or low beam, hi beam etc. All you need to test the circuit is a 12v test light, I'd recommend multimeter if you have one kicking around. By the way 30 and 87 terminals are reversible so do 85 and 86, you could wire 87 to battery and 30 to device, vice versa.
Look at my garage door opener thread, similar idea. https://www.hdforums.com/forum/sport...or-opener.html
Look at my garage door opener thread, similar idea. https://www.hdforums.com/forum/sport...or-opener.html
Last edited by 128auto; Nov 8, 2011 at 04:39 AM.
Road Warrior
Joined: Feb 2011
Posts: 1,499
Likes: 25
From: Mesquite,Nevada
I been thinking of putting them on. Where or what do you use for a switch to turn them on and where does it mount?
Trending Topics
Thread Starter
|
Tourer
Joined: Oct 2011
Posts: 265
Likes: 101
From: Spokane, WA
Rectified initial post....
Hey thanks for the help you two. It got me past the road block and I got them installed. Just some cheap silver bullet looking ones but helps with the side of the road and to be seen better while scooting around in the day time. The rectified diagram is going to help others also if their search finds this thread.
Yes, I remember seeing your thread about the garage door opener. Loved it, wished i had a garge door opener to do it on mine. I Would love and automatic gate opener also....

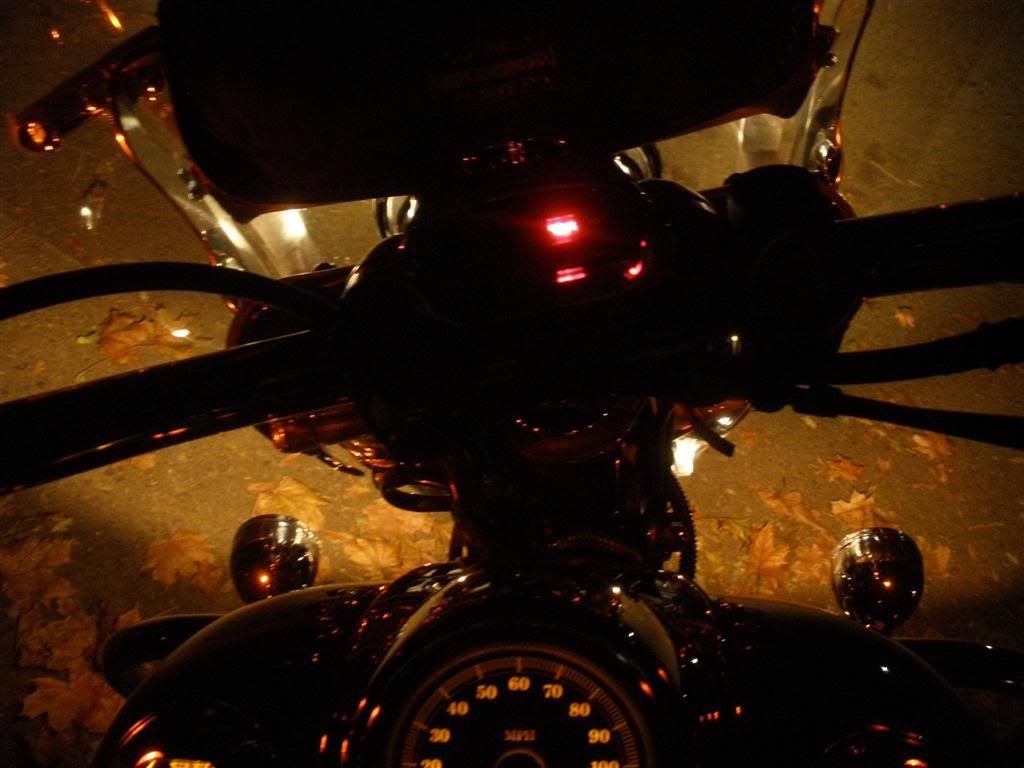


I installed them so they would come on when the low beams were on and shut off when the high beam was selected. so the low beam is the switch but I also added a small toggle switch wrapped in shrink wrap and liquid tape. It's hard to see with it tucked in with the other wires under the dummy lights. I picked that wire to put the toggle just because it was the closest coming out of the headlight. Add it to any one of them and the relay will not work if the toggle switch is off. It lets me override the lights if I need to say like a low battery start.

Last edited by Gee; Nov 9, 2011 at 12:49 AM.
HD Forum Stories
The Best of Harley-Davidson for Lifelong Riders

8 Best Harley-Davidson Motorcycles Ever
Pouria Savadkouei
10 Worst Harley-Davidson Motorcycles Ever
Pouria Savadkouei
Killer Custom's Jail Break Is The Breakout That Refused to Blend In
Verdad Gallardo
Crazy Bunderbike Build Looks Amazing, But Is It Impossible to Ride?
Verdad Gallardo
Harley-Davidson Reveals Super Cool Cafe Racer Concept
Verdad Gallardo
Engraved Rebellion: Inside Bundnerbike's Glam Rock II
Verdad Gallardo
10 Motorcycles You Should Never Buy
Joe Kucinski
10 Things Harley-Davidson Needs to Fix in 2026
Verdad Gallardo
Southpaw Super Glide: A Left-Hand-Drive 1979 Harley FXE Built to Fit the Rider
Verdad GallardoRoad Warrior
Joined: Feb 2011
Posts: 1,499
Likes: 25
From: Mesquite,Nevada
Rectified it? Hell you damn near killed. Old joke reference......
Hey thanks for the help you two. It got me past the road block and I got them installed. Just some cheap silver bullet looking ones but helps with the side of the road and to be seen better while scooting around in the day time. The rectified diagram is going to help others also if their search finds this thread.
Yes, I remember seeing your thread about the garage door opener. Loved it, wished i had a garge door opener to do it on mine. I Would love and automatic gate opener also....
I installed them so they would come on when the low beams were on and shut off when the high beam was selected. so the low beam is the switch but I also added a small toggle switch wrapped in shrink wrap and liquid tape. It's hard to see with it tucked in with the other wires under the dummy lights. I picked that wire to put the toggle just because it was the closest coming out of the headlight. Add it to any one of them and the relay will not work if the toggle switch is off. It lets me override the lights if I need to say like a low battery start.

Thread
Thread Starter
Forum
Replies
Last Post