When you click on links to various merchants on this site and make a purchase, this can result in this site earning a commission. Affiliate programs and affiliations include, but are not limited to, the eBay Partner Network.
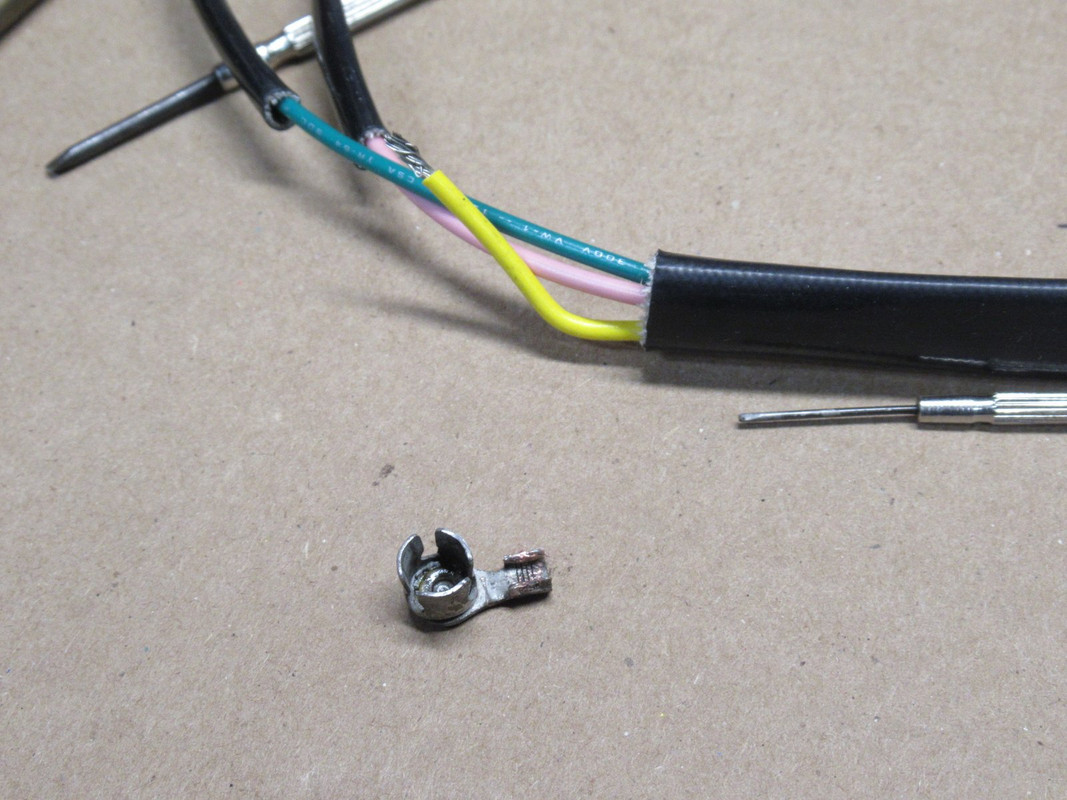
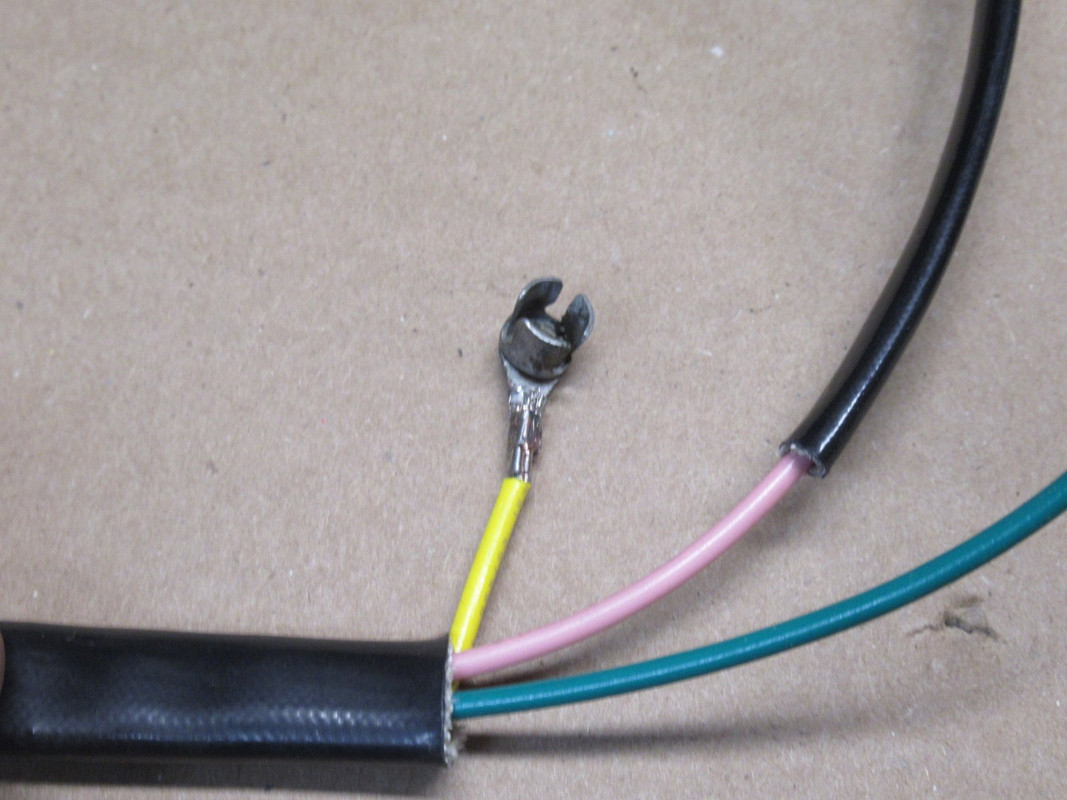
Thank you very much for the picture, that is extremely helpful. I ordered the 34621-82 part because every diagram I look at tells me that is the correct number. If you look at it online, it is not the same as yours. What you have is the exact part I need to find, and have had ZERO luck sourcing one.
I think I read that the newer version can be used in place of the old one. But maybe it was just internet lore?
Thanks to @troy montoya I have OEM clips for my handlebar wiring. Thanks, Troy
Not much else going on now. Thursday I am going to soda blast my clutch and brake lever mounts and the four brake calipers I now own!
Then I will practice powder coating with the worn out clutch mount so I can eventually do all of the parts.
So it was a semi-successful day at my friend's garage. I was able to clean the brake m/c and clutch mount pretty well, but the calilpers must have been powder coated, they were impossible to get completely clean! The fitting is from the front brake hose assembly, I wonder if I should wire brush it to be shiny? I was able to get an NOS top hose and some good used lowers, so not cutting up the later hose assembly.
Does anyone have advice on removing the coating from the calipers? Thanks
hi joe,
just a tip, you might try Air craft grade powder striper ,i got some frome a German chemical supply Co. it worked fine or Eastwood products has a very good powder coat stripper . . .
The brass brake line splitter would not be super shiny, just dull brass stock with a satin finish not unlike what you have now, maybe a bit brighter in color like anything thats new.
I got a lot of suggestions for Aircraft paint or powder stripper, but since they stopped using methylene chloride, it isn't as effective. I will give them another go with wire wheels and sand blasting, then do a test with powder over what remains.
Roger on a little more shiny brass.
[edit: I found an old can of paint stripper that contains methylene chloride, so I will give that a try!]
Success! 15 or so years ago I bought some paint stripper for a car restoration and still have most of a gallon. It still has the harsh chemical methylene chloride that you can't get any more. I soaked parts in it for 15-30 minutes:
This stuff did a number on the powder coat and my glove! You can see the plastic came off in sheets.
After a few hours of stripping and cleaning, I wound up with four clean calipers. I'll roughen the surface and get rid of little remnants with my friend's soda blaster tomorrow or Tuesday.
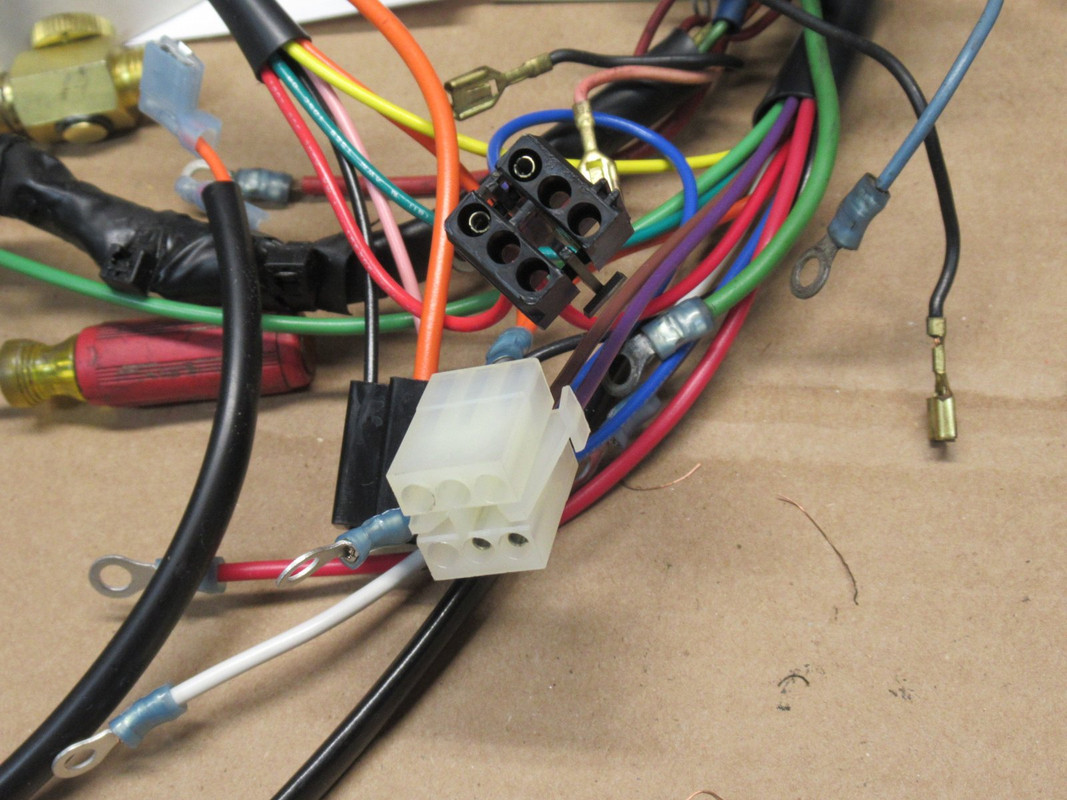
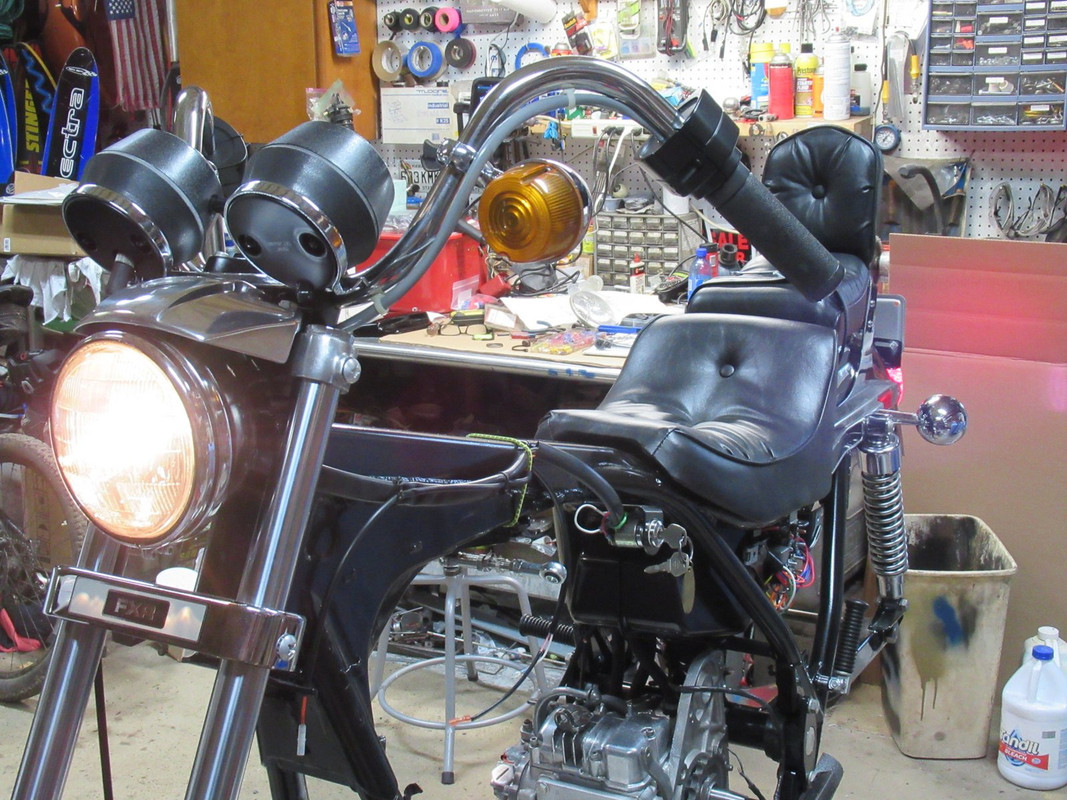
The Made-in-USA V-Twin main wire harness came in and I installed it today. My local shop's prices are lower than online, too. First had to take care of a couple details.
First it didn't come with a neutral switch connector. Don't know why, but I was able to pry off the original one and crimp it on.
The socket connector for the rear fender wiring was white, but I had a black one and swapped out the wires.
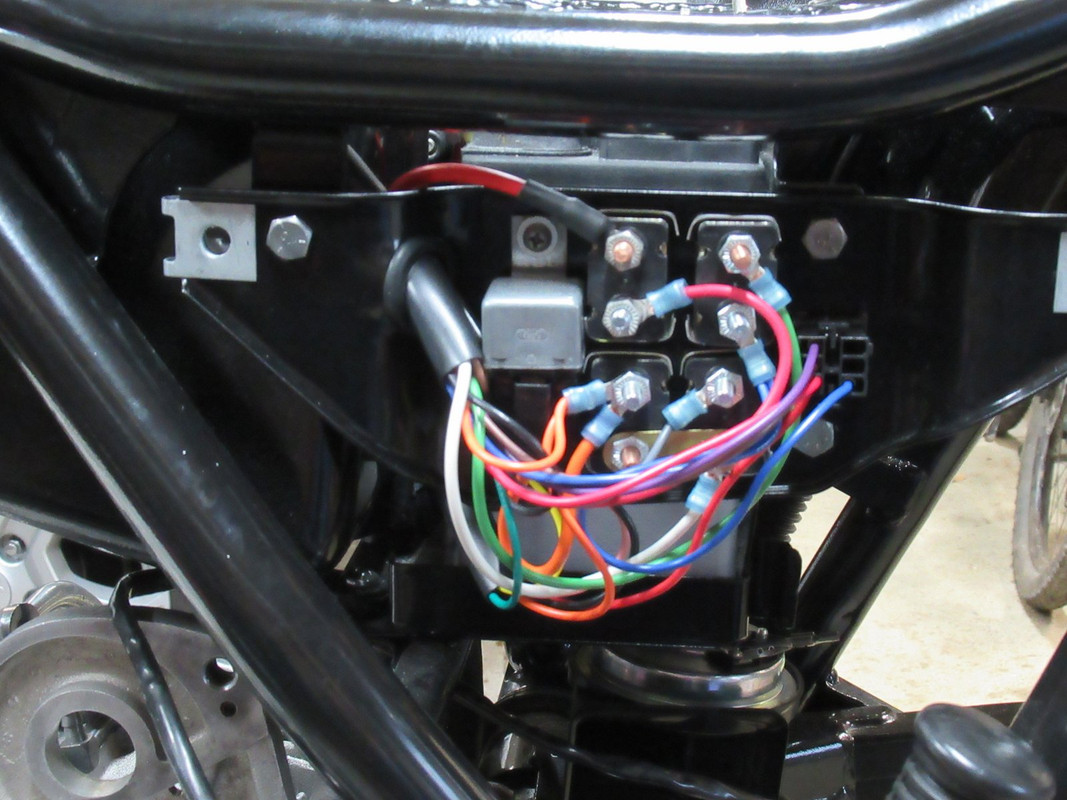
Then I fed the wires thru the electrical panel with a new grommet and wired it all up on the bench. Here it is installed.
Unfortunately, when I was feeding the motor section around the frame and oil tank I accidentally yanked off the neutral connector! Yes I'm a dummy. They are available thru Harley so I'll be taking another trip soon.
The wiring in the headlight bucket went well, no problems once I figured out the orientation of the connectors in the wiring diagram again. The strain relief clip was a royal pita, but it succumbed to my efforts, lol.
I installed a temporary ground wire from the battery to the frame, and Success! I left that goofy ignition-lights jumper installed, until it goes thru judging, lol. I tested the neutral and oil pressure lights and the starter relay (with a test light). Turn signals and brake lights work too.
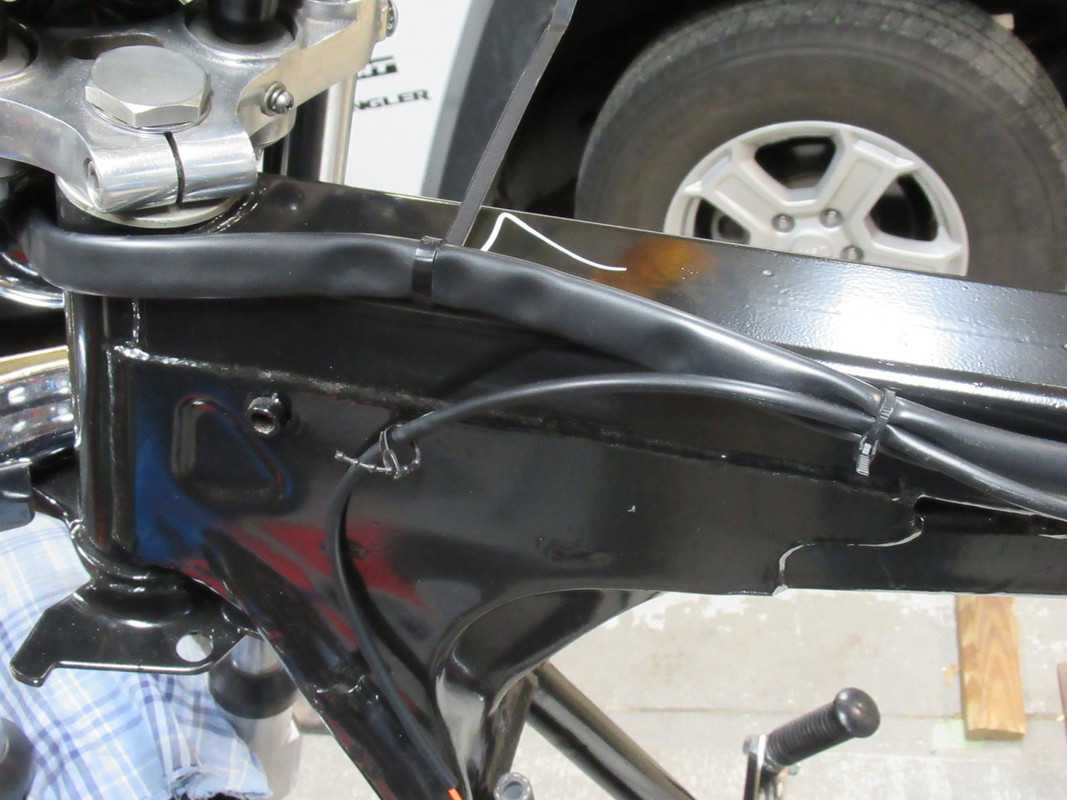
One thing I didn't take a good picture of was how the original harness ran under the tank. There was a hole in the frame so I put a clip in it. Does this look right?
7 Surprising Harley-Davidson Products that Are Not Motorcycles
Slideshow: The bar-and-shield logo shows up on far more than motorcycles, some of the company's most unexpected products have nothing to do with riding.
Slideshow: From the troubled AMF years to modern misfires, these bikes earned reputations for reliability issues, questionable engineering, or disappointing performance.
Crazy Bunderbike Build Looks Amazing, But Is It Impossible to Ride?
Slideshow: The Swiss custom shop has taken a Harley Softail and stretched it into something so long and low that it looks closer to a rolling sculpture than a conventional motorcycle.
Engraved Rebellion: Inside Bundnerbike's Glam Rock II
Slideshow: A standard cruiser becomes an intricate metal canvas in the hands of a Swiss custom house known for pushing Harley-Davidson platforms far beyond their factory brief.
Slideshow: Harley-Davidson's challenges aren't abstract; they show up in dropping shipments, shrinking dealer traffic, and strategic decisions that aren't yet translating into growth.