


Progressive Drop In Kit Install - Step By Step
Thread Starter
|
Elite HDF Member
Joined: Jan 2006
Posts: 4,357
Likes: 11
From: The Lone Star State
Well, this was something that kind of intimidated me at first. The idea of taking my frontend apart was a little worrisome. However, after diving into it, it really was easy and I learned a lot.
I used the progressive drop-in kit and lowered the frontend 2". I love the new feel and how the bike handles. The looks are great too...
I had to unwire my turnsignals because they are mounted on my FL forks. I removed the headlight and fork tins. I also layed the handle bars back on on the tank but this is not necessary.
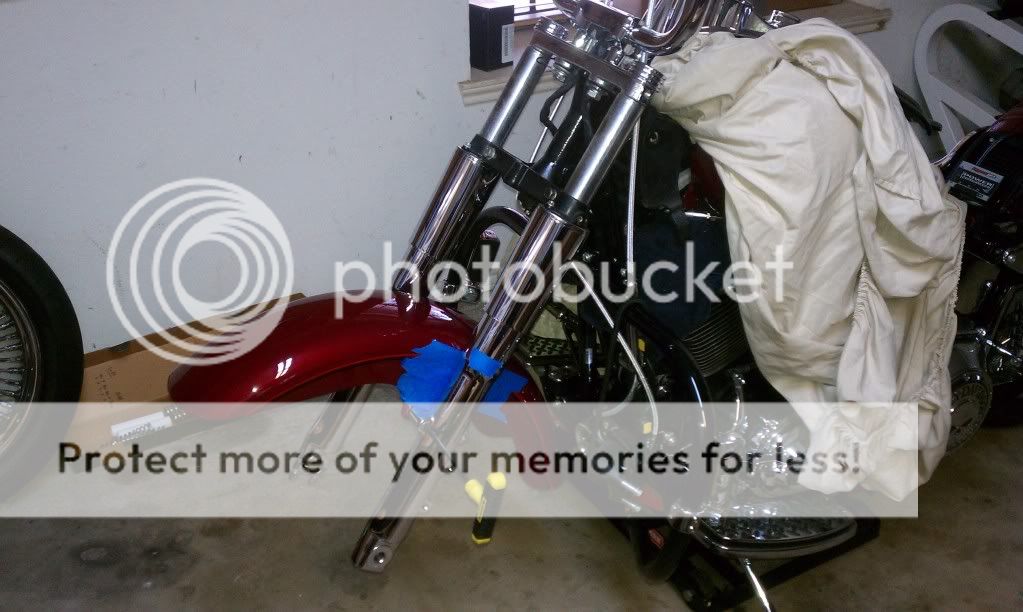
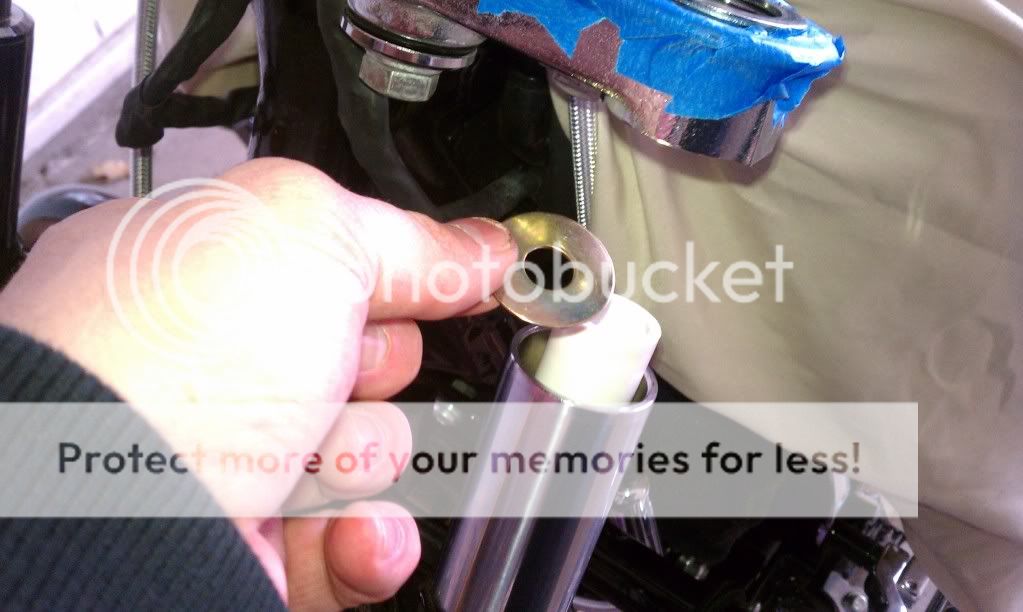
The fork caps can be accessed and removed without removing the bars. Once the caps are removed, the pinch bolts can be loosened and the fork tubes will slide right out. I removed the wheel, front fender, brake caliper, etc. and removed each tube individually. However, you can leave all that on and just slowly raise the bike on the lift, and the tubes will slide through the tree and allow you to take off the cap holding the fork spring. The cap is under pressure from the spring so be careful. Once you access the tube, remove the stock spring, replace fork oil with heavy fork oil (previously drained obviously) and put in the progressive kit which includes a big spring, smaller compensator spring, and 2 brass washers, and a PVC spacer that you will cut to fit for your particular model per the instructions.
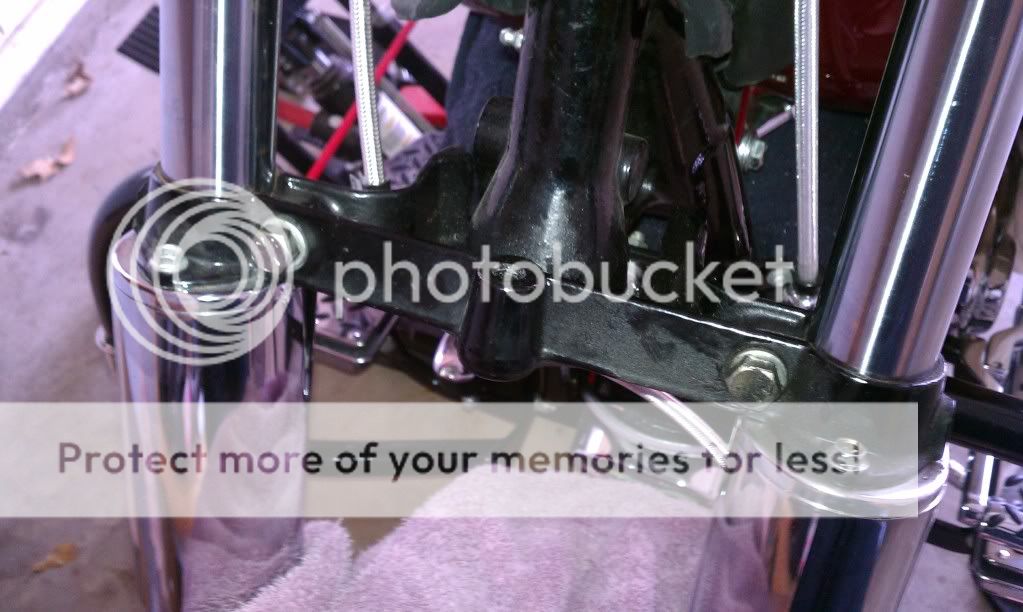
Here are some showing me accessing the tubes without removing the bars:

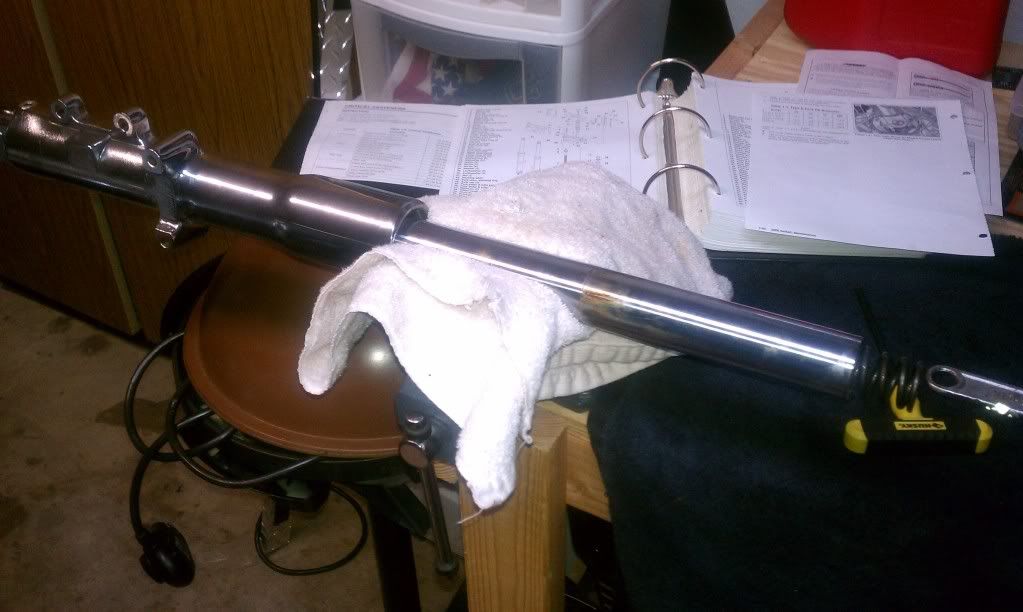
Adding another ounce of fork oil. FL's need 12.9 ounces:

The spacer needed to be cut to 3" to equal a 2" drop.
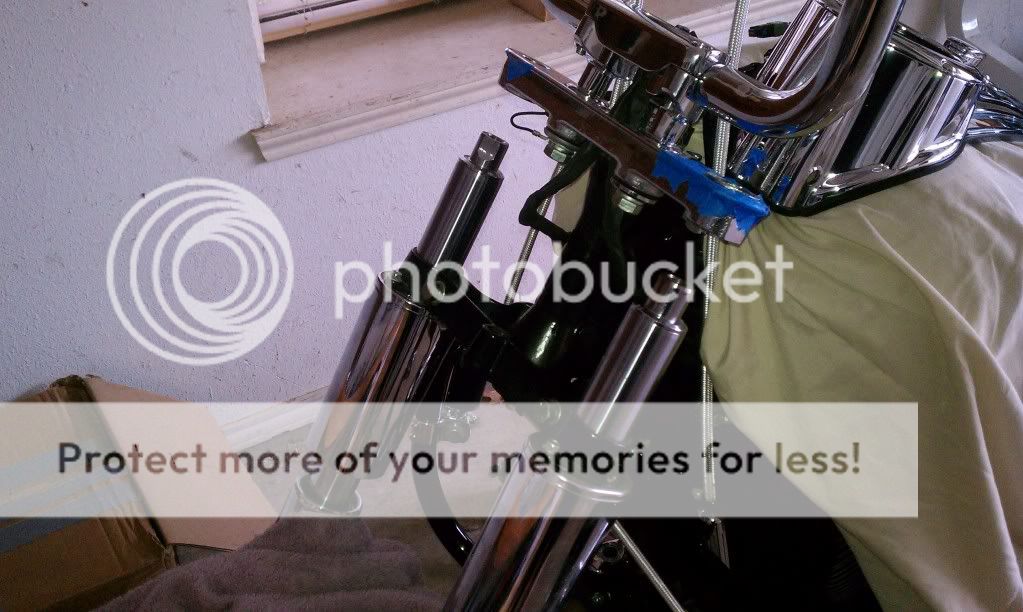
After cutting the spacer, put the cap back on, slide the tubes back in place, tighten down the fork cap and pinch bolts, then put all your tins, headlight, light bar, etc. back on.
I learned a lot and really like the results. Good Luck!
I used the progressive drop-in kit and lowered the frontend 2". I love the new feel and how the bike handles. The looks are great too...
I had to unwire my turnsignals because they are mounted on my FL forks. I removed the headlight and fork tins. I also layed the handle bars back on on the tank but this is not necessary.
The fork caps can be accessed and removed without removing the bars. Once the caps are removed, the pinch bolts can be loosened and the fork tubes will slide right out. I removed the wheel, front fender, brake caliper, etc. and removed each tube individually. However, you can leave all that on and just slowly raise the bike on the lift, and the tubes will slide through the tree and allow you to take off the cap holding the fork spring. The cap is under pressure from the spring so be careful. Once you access the tube, remove the stock spring, replace fork oil with heavy fork oil (previously drained obviously) and put in the progressive kit which includes a big spring, smaller compensator spring, and 2 brass washers, and a PVC spacer that you will cut to fit for your particular model per the instructions.
Here are some showing me accessing the tubes without removing the bars:
Adding another ounce of fork oil. FL's need 12.9 ounces:
The spacer needed to be cut to 3" to equal a 2" drop.
After cutting the spacer, put the cap back on, slide the tubes back in place, tighten down the fork cap and pinch bolts, then put all your tins, headlight, light bar, etc. back on.
I learned a lot and really like the results. Good Luck!

Former Sponsor
Joined: Jan 2009
Posts: 19,364
Likes: 40
From: Los Angeles, CA
The intiminators are supposed to drastically improve the handling.
Drew
Supporter


Joined: Feb 2009
Posts: 1,685
Likes: 36
From: Hoboken, NJ

The intiminators are supposed to drastically improve the handling
What are "intiminators" again?
What are "intiminators" again?
Trending Topics
Former Sponsor
Joined: Jan 2009
Posts: 19,364
Likes: 40
From: Los Angeles, CA
HD Forum Stories
The Best of Harley-Davidson for Lifelong Riders

7 Surprising Harley-Davidson Products that Are Not Motorcycles
Verdad Gallardo
8 Best Harley-Davidson Motorcycles Ever
Pouria Savadkouei
10 Worst Harley-Davidson Motorcycles Ever
Pouria Savadkouei
Killer Custom's Jail Break Is The Breakout That Refused to Blend In
Verdad Gallardo
Crazy Bunderbike Build Looks Amazing, But Is It Impossible to Ride?
Verdad Gallardo
Harley-Davidson Reveals Super Cool Cafe Racer Concept
Verdad Gallardo
Engraved Rebellion: Inside Bundnerbike's Glam Rock II
Verdad Gallardo
10 Motorcycles You Should Never Buy
Joe Kucinski