







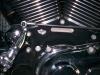
Aaarrgh! Crappy torx screw stripped!

Stellar HDF Member


Joined: Oct 2009
Posts: 2,054
Likes: 26
From: Florida

This idea was suggested to me: cut off the bolt head (it wasn't explained how...) and remove the derby cover, then use vice grips on the nub of the bolt to turn it out.
Has anyone used one of these things where you drill into the bolt and use an extracter? I bought one but I hesitate to use it. No instructions, for one, so I hope it's pretty self explanatory.
Has anyone used one of these things where you drill into the bolt and use an extracter? I bought one but I hesitate to use it. No instructions, for one, so I hope it's pretty self explanatory.
I've use the other method you mentioned on stripped screws and bolts also. Basically I take drill bits and and start drilling into the head of the stripped screw. The idea is not to drill deeper than the head of the screw. Instead you keep changing out drill bits for bigger ones. The goal being that you reach a drill bit size big enough to just drill away the head of the screw, allowing you to just slide the cover off the stem which will still be threaded into your primary cover.
A note: I have never had to do this on my motorcycle. I imagine the margins for error are a lot smaller since often times you gotta worry about slipping and scratching up a part or whatever.
Wish I could offer other advice. I don't think the screws that Harley uses on the derby cover are cheap and would blame the issue more on someone improperly installing one. I have never had a problem with stripping any screws or bolts on my bike (knock on wood). I have had it since new and have done all manner of wrenching on it including all my primary oil changes and clutch adjustments.
As soon as I could afford it I bought a set of torque wrenches to cover all the applications of my bike when I am installing parts back on.
Good luck getting that bolt out.

Tourer
Joined: Jan 2006
Posts: 393
Likes: 0
From: Gaylord Michigan
Before i remove any of the torx fasteners for the first time, i heat the end of it with a big soldering iron ... this will melt the loc tite from the factory , and makes the fastener come out ALOT easier.

Thread Starter
|
Tourer
Joined: Feb 2011
Posts: 410
Likes: 1
From: Portland, ME

Success!!! 
Thanks all for the suggestions! I used a 1/4" drill bit and took the head of the bolt off, removed the cover and the rest of the bolt unscrewed very easily.
Ok, a couple wrap up questions:
I've been told to use locktite and never seize. Locktite I know is for keeping the bolt from working loose and as I understand it, never seize is to prevent the bolt from corroding and getting stuck.
Now my question is, do I use both products?
Also, does anyone know the torque pressure for putting the bolts back in?
I found some stainless allen head bolts that should do the trick for replacement. I just have to find the right kind of washers to go with it. The washers on the existing bolts don't come off the bolts.
Thanks all for the suggestions! I used a 1/4" drill bit and took the head of the bolt off, removed the cover and the rest of the bolt unscrewed very easily.
Ok, a couple wrap up questions:
I've been told to use locktite and never seize. Locktite I know is for keeping the bolt from working loose and as I understand it, never seize is to prevent the bolt from corroding and getting stuck.
Now my question is, do I use both products?
Also, does anyone know the torque pressure for putting the bolts back in?
I found some stainless allen head bolts that should do the trick for replacement. I just have to find the right kind of washers to go with it. The washers on the existing bolts don't come off the bolts.

6th Gear
Joined: Nov 2009
Posts: 14
Likes: 0
From: Southern Indiana
I don't know the exact specs for your bolt (5mm3.5mm or grade)
But since you used 1/4" bit to drill it out I'd guess bout 5mm shank so dry tourque for that would b less than 36 in-lb = 3ft lbs so unless you have a good in-lb 1/4 inch rachet just snug it up and if you apply loc-tite you should be good to go.
But since you used 1/4" bit to drill it out I'd guess bout 5mm shank so dry tourque for that would b less than 36 in-lb = 3ft lbs so unless you have a good in-lb 1/4 inch rachet just snug it up and if you apply loc-tite you should be good to go.
Tourer
Joined: Jul 2009
Posts: 325
Likes: 1
From: Northern Ontario, Canada
Torque specs are 84-108 in lbs. Only use one or the other (loctite/ anti sieze) On Harleys use red locktite on fastners you have no interest in removing and blue on fasteners you need to remove for servicing. In the case of the derby a small dab of blue will do you.
Cheers!
Cheers!

Road Warrior
Joined: Nov 2008
Posts: 1,260
Likes: 5
From: Batesville Ga
Why is anyone using loctite on derby cover screws? I've never seen that in the service manual and have never done it. No leaks and no problems removing the torx.
HD Forum Stories
The Best of Harley-Davidson for Lifelong Riders

7 Surprising Harley-Davidson Products that Are Not Motorcycles
Verdad Gallardo
8 Best Harley-Davidson Motorcycles Ever
Pouria Savadkouei
10 Worst Harley-Davidson Motorcycles Ever
Pouria Savadkouei
Killer Custom's Jail Break Is The Breakout That Refused to Blend In
Verdad Gallardo
Crazy Bunderbike Build Looks Amazing, But Is It Impossible to Ride?
Verdad Gallardo
Harley-Davidson Reveals Super Cool Cafe Racer Concept
Verdad Gallardo
Engraved Rebellion: Inside Bundnerbike's Glam Rock II
Verdad Gallardo
10 Motorcycles You Should Never Buy
Joe Kucinski
10 Things Harley-Davidson Needs to Fix in 2026
Verdad Gallardo
Novice
Joined: Apr 2010
Posts: 24
Likes: 0
From: Another Planet most days
chiefe is correct 84-108 in lbs. and blue loc-tite, just had this exact problem, had to go with oversized drill bit and head popped right off. I got some chrome screws they have worked great.