When you click on links to various merchants on this site and make a purchase, this can result in this site earning a commission. Affiliate programs and affiliations include, but are not limited to, the eBay Partner Network.
Thanks Dano, regardless the so called good news from milwaukeegaskets i just ordered the PF3C as recomended directly from CA Cycleworks and should get it by tomorrow or Monday the latest... I'll take the time tonight to do some cleaning on connectors as suggested and I've an itch that like the fuel pump was changed when I got "Jessica" a month ago by the same guy that took the TPS, maybe maybe maybe a hose inside the tank may be loose or pinched ... the issue is that now I kind of not trusting the work this guy made so I'll have to re-check certain things.
I consider myself as a half way home garage mechanic, being 50 years old I did some work in all my bikes and cars back in the 80's and 90's.... lately I had a 1999 Range Rover (**** I just realized "Jessica" is the same year jajajaja) for a couple of years and I had to get back to doing a lot of stuff myself with the help of guys like you and the others here... Not afraid of tools and get all greased up.... of course after getting some pointers here and watching some good videos on youtube.
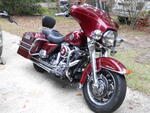
Hello to you all, even tough this is a little embarrassing there is something to be learn... I want to start by telling you that the so called mechanic was originally called to do a fuel tank cleaning and change of pump, filter and regulator as I was sure that Jessica needed at least that for sure with several years in storage after the previous owner passed away.
I called this guy as he had done some minor jobs for me in the past with the Honda NC700X. As i “trusted” the guy he came home to work on Jessica *** I was at work, I came home at lunch time, showed me the awful muddy stuff that came out of the tank and showed me a brand new pump in box that he was putting on.. I agree to the price and went too work... I came back later after work and Jessica was running a little rough but “ok” ... he said the injector for the back cylinder was bad and that he’ll come back the next day to install a new one... he came again while I was at work and send me a nice video of Jessica running good... I was happy and you know by now what happened a couple of days later.
The culprit of my problems (or Jessica’s) has been found... Tank was not cleaned, just drained (see picture below), New Pump is not the correct one for my bike, Filter was by passed and regulator not installed at all !!!!... adding to that of course the now missing TPS and what appears to be .... GUESS WHAT ???? A bad injector for the back cylinder !!!!!
I don’t want to take any credit for finding his out... I took Jessica on Saturday to a certified shop close to home and today by 10:30 am they called and ask if I came come over to take a look on what they found.
On the bright side, Quantum Complete Fuel Pump Kit is in transit, Tank is in the process to be acid clean, blasted, primed and coated inside, both injectors will be work on or replaced if needed, PF3C arrived today and will be installed and set up while I can get the 4C and a new set of Michelin Commander III’s also arrived over the weekend... Hopefully I’ll have good news before the week is over... Thanks for your patience and assistance all !!!!
What a ***** show, and now see the reason that the guy went MIA on you.
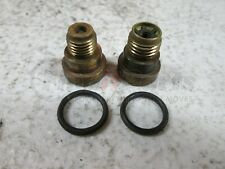
Tank coating, ethanol in the petro really did that in, and if your going to keep using E10 fuels, might want to bring that up to the shop so they install the correct fuel lines that are not going to gum up from the ethanol fuel like the OEM lines. The other areas that you will need to make sure of, is the tank check valves that don't take well to ethanol as well (have rubber ***** in them). The front out check valve is still available if needed, while the in check vavle 61408-95A is not (not the end of the world, since the work around is to use a newer check valve that the threads section is smaller that the tank threads (you use an O ring for the seal part of it to the bottom of the tank thread flange), and the in line fuel line kit will hold it in place when it's installed.
If you need a part number and O ring size for the replacement in check valve, can pull the one out of my bike to you are part number and O ring size.
As for fuel regulator, its part of the intake, so had to have that on, or the throttle body would be pissing gas out as soon as the fuel pump primed.
Part 10 regulator, and held in by 18 and 20 on the manifold. https://partsfinder.onlinemicrofiche...ION%20ASSEMBLY
Bypassing the filter on the other hand, granted that the pump screen will pick up most of it, but if the lad did not have a new filter, could have just back-blown the old filter out to reuse it until he did get a new filter to replace it. The pump filter will still allow enough small debris through it to clog an injector with the tank filter not in play.
Note, When i installed the Quantum fuel pump on my bike, the pump is slightly shorter than the OEM pump. So the trick is to use the bottom rubber isolation piece that will not work with the new pump on the bottom, on the top of the top rubber piece up side down, to hold the pump all the way down in the plastic housing piece. 10:34 in the below video.
The fuel level gauge should be able to be saved by just cleaning it up/ its restat bars as well. If the reading is getting funky from weak swipers tension, they can be tweaked to make better contacts to the stat pad (kind of running theme on tweaking swipers to fix parts in this topic).
Also, since the your going to be deep into the throttle body, now is the time to replace the in intake seals and fuel regulator too (regulator should come with the fuel pump kit). On the rubber intake seals, my trick is to grease them with dielectric grease inside and out, since it will not harm the seals to start with, and allow the seal to last a little longer as well. Rule of hand, change them at least every 5 years, or sooner as needed since the will shrink and will cause an air leak. If you get decel pop, they are leaking.
As for the injectors, may have to first back blast them as they are being cycled, to break free any large debris that may have been pushed into them from running the bike without the fuel filter. Also, while you have the regulator and injectors out of the TB intake, and lines off the tank, make sure to blast the Fuel in and out to the Throttle body to get any caught debris out of them to begin with, then the throttle body out to clean all of them of debris. Trust me, the guy bypass the filter did you no favors,and if don't clean out all the debris now, will be pulling the tank again to unclog a injector a second time.
Woe thank’s a lot Dano vey helpful info.... I’ll follow you recomndations.
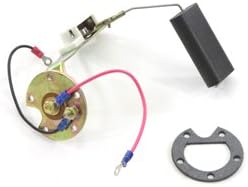
On the oher hand I have an issue here.... The fuel gauge and sending unit inside the tank are not salvageable... I found the fuel gauge ... well a new one but the sending unit I can’t seem to find the right one.
All you need to do is use some electrical spray contact cleaner on the Stat pad wires to clean them up, then tweak the swipers so they put pressure on the stat wire bars to send the signal to the fuel gauge. The rest of the metal parts on the unit can be cleaned up with evapo-rust.
P.S. if you need the walk through on how to pull the fuel gauge apart to fix it next, let me know. The two problems on most of them, is the three main stud solder joints at the board will be broken from vibration over the years (why you get the low fuel light way too soon) and the second will be the needle shaft needs to be lubed, so it does not stick on the slow swing it should be making.
Hello, how you're all doing??? If I'm lucky enough Jessica is schedule to be started up later this afternoon....
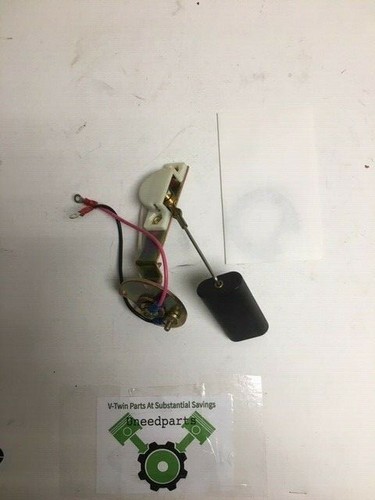
Only bad news is that fuel gauge and sender unit (see picture) for it are beyond all repairs.... Gauge is already ordered but on the hunt for the sender unit... any Idea where I may get it? the ones I found state there are no fit for my bike.
In the mean time old gauge will be placed just to seal the hole in the tank and some wiring by-pass will be done as I understand something there needs to be connected in order for the fuel system to work. So I guess I'll have to be careful but at the same time investigate the real MPG Jessica will be doing after the repairs.
Since I still see the swiper still attached to the arm, parts are very serviceable.
Myself, would tape off the swiper part to clean that by hand, but rest of the steel parts that are rusted, would get a quick trip through the bead blast cabinet to knock off the rust to begin with.
Simple green to clean up the stat housing to begin with, then electrical contact cleaner to clean up the restat bars. From here, would solder a new wire from the stat board that goes to the center isolated stud, and with the swiper cleaned up and tweaked so it make contact to the stat pad bars, quick reassembly of the part.
The down and dirty, is that the swiper/ float arm part is grounded, and the stat housing via swiper across the stat pads is sending the changing resistance through it (depending on the height of the float in the tank) back to the center isolated post for the fuel gauge to pick up that up on the red wire. So on the top of the level sensor, you have the center red wire, will have a ground wire junction point with wire, and then the orange and black wire up the gas tank tube from below to supply 12 volts with ignition to the fuel gauge. So the two ground wires (one from level sensor top of plate, and the one coming up the the tank tube, get both connected to the fuel gauge ground post.
Note, when Harley made the sensor wire Red, is still beyond me, since it really not a hot wire to start with. The orange wire on the other hand, is a 12 ignition switched wire instead. Hence when you look at the back of the fuel gauge, will have the light and it trace that goes back to the termial, and that is the terminal that gets the orange wire. Center post between the two is the ground terminal, and the other terminal is the reistance wire from the fuel level gauge.
If all this is beyond you, then box the parts up and send them to tristar to re-build the unit isntead.
To add, the gas gauge is not going to seal anything off (major gas leak), so may need to make a blank off plate with gasket before you install the fuel gauge.
1) I'll check if I can (or dare) to clean it out... or maybe I'll send it directly to Tristar and let them do the work... let's see.
2) Thanks on the gauge / cap advise, I suppose the shop will now that but I'll ask later on.
On the other hand, yesterday I went to check progress and YESSSS!!!! Jessica was back to life, It sounds awesome and steady, no hiccups... of course I still need to test it out of the shop but things look very promising. If everything goes as planned I should be picking her up this afternoon.
I'll get back to you later today or tomorrow with first impressions.
7 Surprising Harley-Davidson Products that Are Not Motorcycles
Slideshow: The bar-and-shield logo shows up on far more than motorcycles, some of the company's most unexpected products have nothing to do with riding.
Slideshow: From the troubled AMF years to modern misfires, these bikes earned reputations for reliability issues, questionable engineering, or disappointing performance.
Crazy Bunderbike Build Looks Amazing, But Is It Impossible to Ride?
Slideshow: The Swiss custom shop has taken a Harley Softail and stretched it into something so long and low that it looks closer to a rolling sculpture than a conventional motorcycle.
Engraved Rebellion: Inside Bundnerbike's Glam Rock II
Slideshow: A standard cruiser becomes an intricate metal canvas in the hands of a Swiss custom house known for pushing Harley-Davidson platforms far beyond their factory brief.
Slideshow: Harley-Davidson's challenges aren't abstract; they show up in dropping shipments, shrinking dealer traffic, and strategic decisions that aren't yet translating into growth.