








Project FXDXT is underway

Road Warrior


Joined: Sep 2008
Posts: 1,465
Likes: 16
From: Nor Cal

Few years back in Hot Rod mag. Tthey had a product that reduced heat on the headers. What they did was tape a tennis on one end poured the product in and taped another tennis ball on the other end rolled it around to coat the inside. Wish I remembered the product. It was silver/gray in color.
After looking at the bike and the spot I wanted to mount the ignition I am not sure I am going to put it there. I am thinking of relocating the choke and putting the ignition where the choke is although I am not sure that will work either due to the amount of clearance between the coil and where the ignition would go. I'll have to mock it up and see what happens.
The choke **** broke as it was split when I bought the bike so I need a new one which is the reason I might do this relocation. I think this bracket will work.
https://www.denniskirk.com/alloy-art...bs.p173318.prd
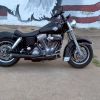
I got some better pics yesterday of the bike too although you still cannot see what the paint really looks like.


I'll get some of the other side today if there is time. The passenger pegs and belt guards are coming off too.
The choke **** broke as it was split when I bought the bike so I need a new one which is the reason I might do this relocation. I think this bracket will work.
https://www.denniskirk.com/alloy-art...bs.p173318.prd
I got some better pics yesterday of the bike too although you still cannot see what the paint really looks like.
I'll get some of the other side today if there is time. The passenger pegs and belt guards are coming off too.
Hey, unless you are in love with the football you may find an OUTLAW HiFlow A/C HERE that will go with your build.
You can find some optional covers HERE.
__________________
DKCustomProducts.com
DKCustomProducts.com

Outstanding HDF Member
Joined: Aug 2009
Posts: 2,938
Likes: 4
From: NC
On my '97 WG, I relocated the ignition from the dash to the horn location on the L side and had a bracket made for it. Much nicer and cleaner looking IMO. I am not able to see your pics here at work as they are blocked.
The choke is now connected to an adaptor (http://www.cv-performance.com/cvp-choke-bracket/ ) to my CV carb, which is on the R side. I need to get a chrome choke **** to match the bracket and top of the carb now. It cleans it up, but will have to get used to choke on the R side. This also cleans it up and my bracket and top motor mount are not compatible on the L side...so had to use the bracket on the carb. lol
The choke is now connected to an adaptor (http://www.cv-performance.com/cvp-choke-bracket/ ) to my CV carb, which is on the R side. I need to get a chrome choke **** to match the bracket and top of the carb now. It cleans it up, but will have to get used to choke on the R side. This also cleans it up and my bracket and top motor mount are not compatible on the L side...so had to use the bracket on the carb. lol
What choke cable did you end up using?
HD Forum Stories
The Best of Harley-Davidson for Lifelong Riders

7 Surprising Harley-Davidson Products that Are Not Motorcycles
Verdad Gallardo
8 Best Harley-Davidson Motorcycles Ever
Pouria Savadkouei
10 Worst Harley-Davidson Motorcycles Ever
Pouria Savadkouei
Killer Custom's Jail Break Is The Breakout That Refused to Blend In
Verdad Gallardo
Crazy Bunderbike Build Looks Amazing, But Is It Impossible to Ride?
Verdad Gallardo
Harley-Davidson Reveals Super Cool Cafe Racer Concept
Verdad Gallardo
Engraved Rebellion: Inside Bundnerbike's Glam Rock II
Verdad Gallardo
10 Motorcycles You Should Never Buy
Joe Kucinski
10 Things Harley-Davidson Needs to Fix in 2026
Verdad Gallardo
Outstanding HDF Member
Joined: Aug 2009
Posts: 2,938
Likes: 4
From: NC
The Thunderheader seems to get really hot, even at 6am. When I rolled in to work it was radiating heat on my leg. I am going to have to get the heat shields for them or something. I was thinking about the titanium DEI wrap like 07Bobber has maybe too, but I'm not so sure about the wrap. I know it will keep the heat way down, but I want my pipe to have some longevity.
I would be interested in the actual temp numbers you are experiencing with that jetting setup, then an after jetting temp number as read by a infrared temp gun throughout any of the heat reduction methods whether it be the pour in coating, VHT, or the DEI Titanium wrap.
I am considering the DEI Titanium wrap for mine as well, but have also considered just painting it again with some high heat paint and not wrapping my T Header.
Suggestions on the best Black Semi Gloss or Flat High Heat Paint for this application appreciated. Someone suggested the VHT paint which is readily available at Auto Parts stores. Have you guys had any luck with this?
I would be interested in the actual temp numbers you are experiencing with that jetting setup, then an after jetting temp number as read by a infrared temp gun throughout any of the heat reduction methods whether it be the pour in coating, VHT, or the DEI Titanium wrap.
I am considering the DEI Titanium wrap for mine as well, but have also considered just painting it again with some high heat paint and not wrapping my T Header.
Suggestions on the best Black Semi Gloss or Flat High Heat Paint for this application appreciated. Someone suggested the VHT paint which is readily available at Auto Parts stores. Have you guys had any luck with this?

Thread Starter
|
Former Sponsor
Joined: Aug 2005
Posts: 10,968
Likes: 54
LA Choppers high club bars review
I put some of these on the 2002 FXDXT as I really liked the height of them and the price was great as well. Anyone that knows LA Choppers well knows that they manufacture many brands of bars for the industry and makes and extremely high quality product. Initially I was a little concerned about the amount of pull back they had as I prefer the front of my knuckles to be facing directly forward as opposed to any pullback. Well, all my thoughts have proven wrong after the first real ride on this bike.
First off the 13” perfect. They are below my shoulders and I can sit perfectly comfortable with them. You will have to change your cables if your bike came with stock bars that are not apes. As far as a street bob I really don’t know as my bike came with lower bars than that. It seems as if the throttle and idle cables would have been long enough but my idle cable was shot when I picked up the bike so I ordered all new cables via Drag Specialties as LA Choppers did not have the brake line that I needed. Otherwise I would have ordered directly from them as they have some great pre measured kits for taller bars.
I ordered +4” on everything except the brake lines and the throttle and idle cables along with the clutch could avhe been a few inches shorter. I think +2” would have done it but I could not find concrete info on what to order for my bike. Regardless, everything worked fine. For the dual disc brakes I found a braided stainless steel kit from Drag that was stock length for my bike and ordered a separate upper line that was 19” long. It said the kit was only for the lowers but low and behold when it arrived it had the upper line, the tee, and the lowers. I ended up using this entire kit and just bending the metal portion of the upper line to make it work. It fit perfect. I find this kind of strange as my stock upper line was unable to reach the bars regardless of how I bent it. At this point I could care less although I have some extra parts left over that I did not need.
Back to the bars. These bars are drilled for internal wiring and very easy to run the wires through as there are no straight corners (which usually have rough welds) for the wiring to be pulled through. In fact my normal procedure of using fishing line and a nut tied to the end to attach to the end of the wires was not necessary to get the wiring through. I merely pushed the wiring down into the bars and grabbed it with a needle nose when it got to the holes in the bottom. That is it. This is by far the easiest time I have ever had with internal wiring for handle bars. The stock wiring is plenty long for these bars as the Dyna has tons of wire run through the backbone of the frame. All that was necessary was to pull the wiring out of the frame (a pain compared to some other models) and run it through the bars. Normally I would disassemble the connectors (Deustch on my older bike) but I was unable to get them out of the frame so I cut and soldered the wiring with heat shrink. This proved to work fine although I think it took a little bit longer. I checked all connections before pulling the wiring back through the frame from behind the battery box to clean things up.
I had taken the tins off for paint so this was much simpler than it would have been with the tins on. The excess wire was neatly tucked away inside the battery box.
Back to the bars. I was sure they would have too much pullback for my taste but they were so comfortable I felt as if I was sitting in a chair relaxing the entire time I was on the bike. Also if you wish to change the angle fo the bars LA Choppers makes a set off offsets that will do just that. I was planning on picking a set of those up but it has proved unnecessary at this point in time. We’ll see how I feel after a 600 mile day but I still think that will not be necessary. Two thumbs way up for the high club bars from LA Choppers.

I put some of these on the 2002 FXDXT as I really liked the height of them and the price was great as well. Anyone that knows LA Choppers well knows that they manufacture many brands of bars for the industry and makes and extremely high quality product. Initially I was a little concerned about the amount of pull back they had as I prefer the front of my knuckles to be facing directly forward as opposed to any pullback. Well, all my thoughts have proven wrong after the first real ride on this bike.
First off the 13” perfect. They are below my shoulders and I can sit perfectly comfortable with them. You will have to change your cables if your bike came with stock bars that are not apes. As far as a street bob I really don’t know as my bike came with lower bars than that. It seems as if the throttle and idle cables would have been long enough but my idle cable was shot when I picked up the bike so I ordered all new cables via Drag Specialties as LA Choppers did not have the brake line that I needed. Otherwise I would have ordered directly from them as they have some great pre measured kits for taller bars.
I ordered +4” on everything except the brake lines and the throttle and idle cables along with the clutch could avhe been a few inches shorter. I think +2” would have done it but I could not find concrete info on what to order for my bike. Regardless, everything worked fine. For the dual disc brakes I found a braided stainless steel kit from Drag that was stock length for my bike and ordered a separate upper line that was 19” long. It said the kit was only for the lowers but low and behold when it arrived it had the upper line, the tee, and the lowers. I ended up using this entire kit and just bending the metal portion of the upper line to make it work. It fit perfect. I find this kind of strange as my stock upper line was unable to reach the bars regardless of how I bent it. At this point I could care less although I have some extra parts left over that I did not need.
Back to the bars. These bars are drilled for internal wiring and very easy to run the wires through as there are no straight corners (which usually have rough welds) for the wiring to be pulled through. In fact my normal procedure of using fishing line and a nut tied to the end to attach to the end of the wires was not necessary to get the wiring through. I merely pushed the wiring down into the bars and grabbed it with a needle nose when it got to the holes in the bottom. That is it. This is by far the easiest time I have ever had with internal wiring for handle bars. The stock wiring is plenty long for these bars as the Dyna has tons of wire run through the backbone of the frame. All that was necessary was to pull the wiring out of the frame (a pain compared to some other models) and run it through the bars. Normally I would disassemble the connectors (Deustch on my older bike) but I was unable to get them out of the frame so I cut and soldered the wiring with heat shrink. This proved to work fine although I think it took a little bit longer. I checked all connections before pulling the wiring back through the frame from behind the battery box to clean things up.
I had taken the tins off for paint so this was much simpler than it would have been with the tins on. The excess wire was neatly tucked away inside the battery box.
Back to the bars. I was sure they would have too much pullback for my taste but they were so comfortable I felt as if I was sitting in a chair relaxing the entire time I was on the bike. Also if you wish to change the angle fo the bars LA Choppers makes a set off offsets that will do just that. I was planning on picking a set of those up but it has proved unnecessary at this point in time. We’ll see how I feel after a 600 mile day but I still think that will not be necessary. Two thumbs way up for the high club bars from LA Choppers.