


1982 FXR Restoration Thread
Road Master


Joined: Nov 2017
Posts: 1,212
Likes: 895
From: Nuremberg, Germany
WoW joe , thats really nice work you got done there, looking forward to your finished paint ! i think thats really cool that you able to do your own paint ! i always thought being a body & paint man would be a fun & rewarding profession ! Good luck on the top & clear coat ! 
Thread Starter
|
Seasoned HDF Member


Joined: Jun 2012
Posts: 6,158
Likes: 2,565
From: CT/FL
Yes, the instant gratification of doing bodywork and paint is very rewarding, but like most things, it's more fun as a hobby than a career.
I sanded the tank all over with 220 grit on a flexible block. The side of the tank where the dent was repaired didn't look right, so I fogged a "guide coat" of cheap black paint and lightly blocked it with 220 grit on a long board. You can see how the repair wasn't perfectly smooth, the lighter areas are where the sandpaper removed the guide coat, and darker areas a little low. Keep in mind these are just a few thousandths off, but they would have been very noticeable under the final paint.
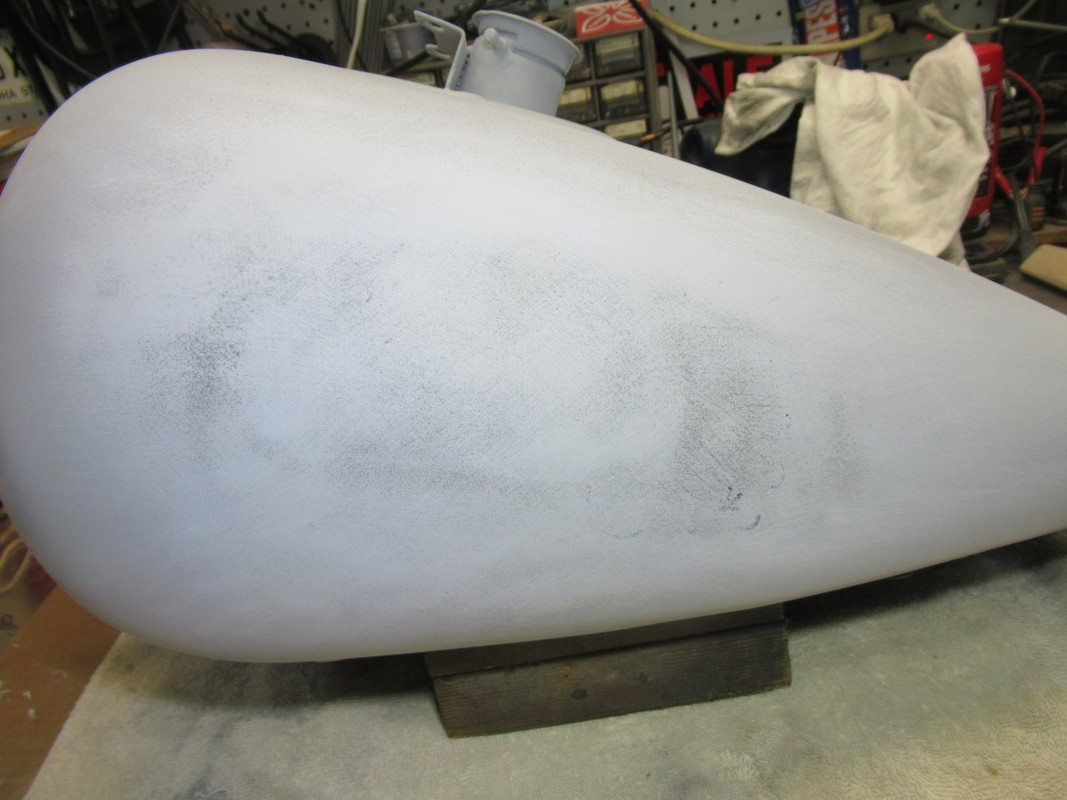
I sanded thru the primer with 80 grit and then another thin layer of body filler brought it back to where it should be. Then more sanding with the long board and flexible block.
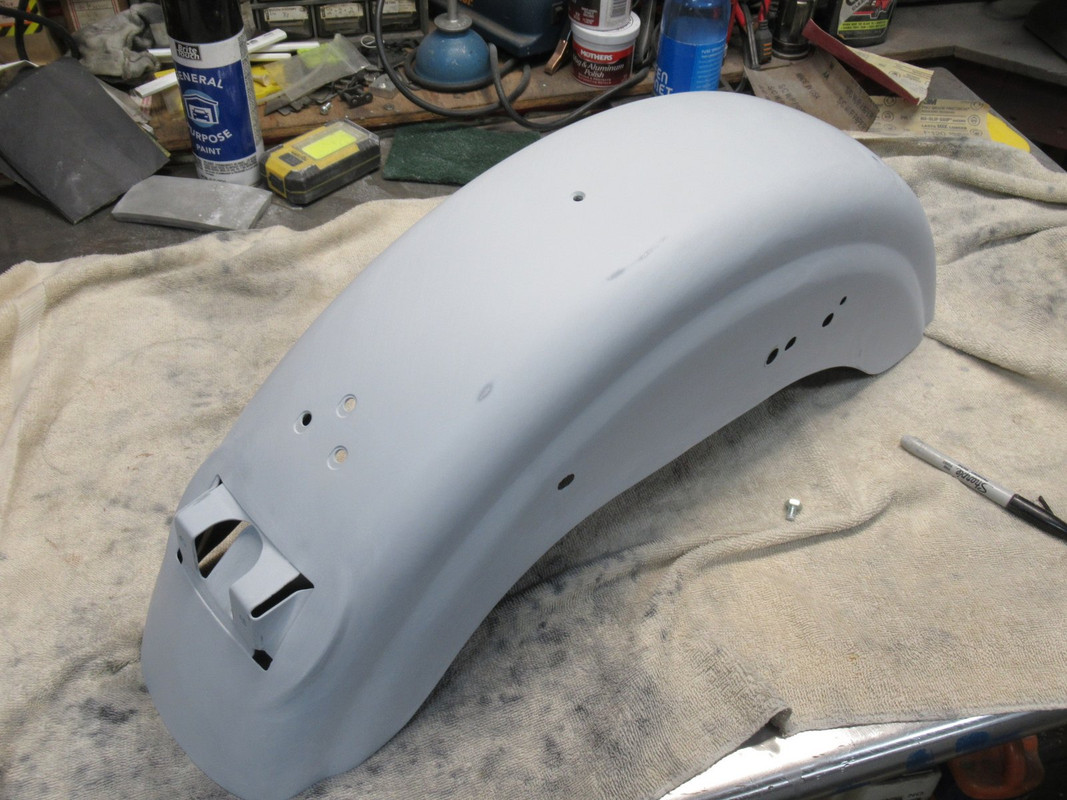
I did one more layer near where I sanded down to bare metal, but didn't take a picture. So then, sand the fenders with the flexible block and 220 grit to remove any unevenness and orange peel from the primer. They are ready for the final coat of epoxy primer and then paint!
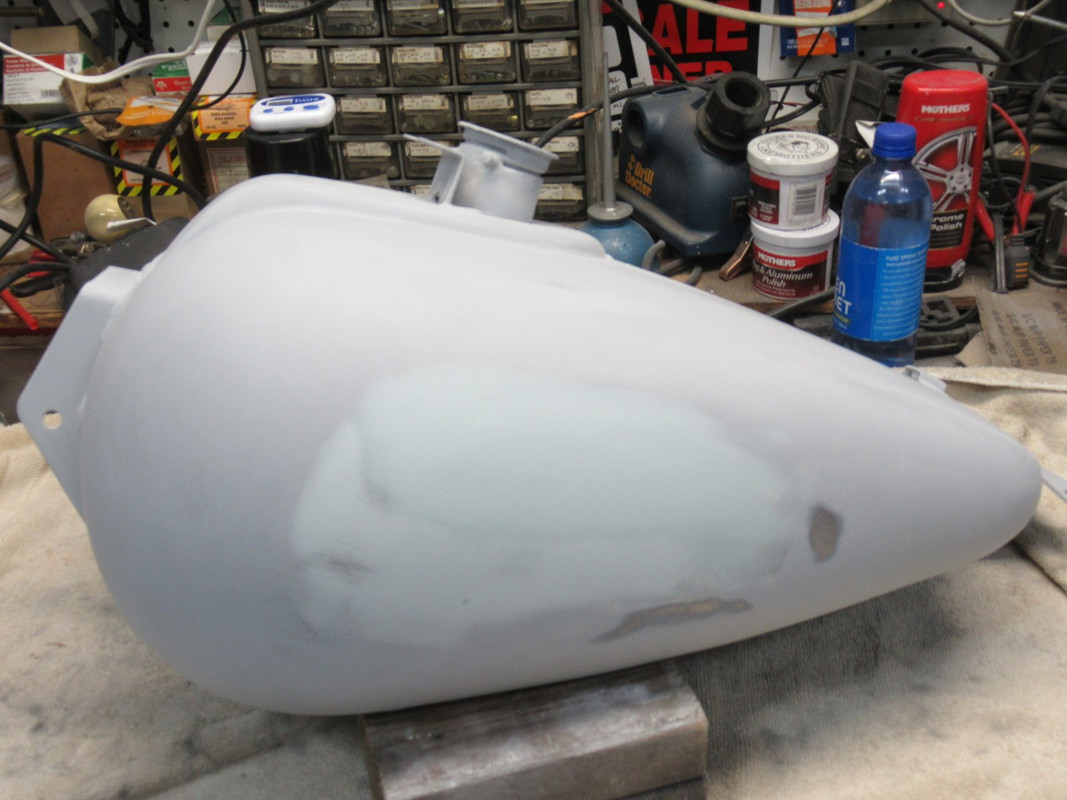
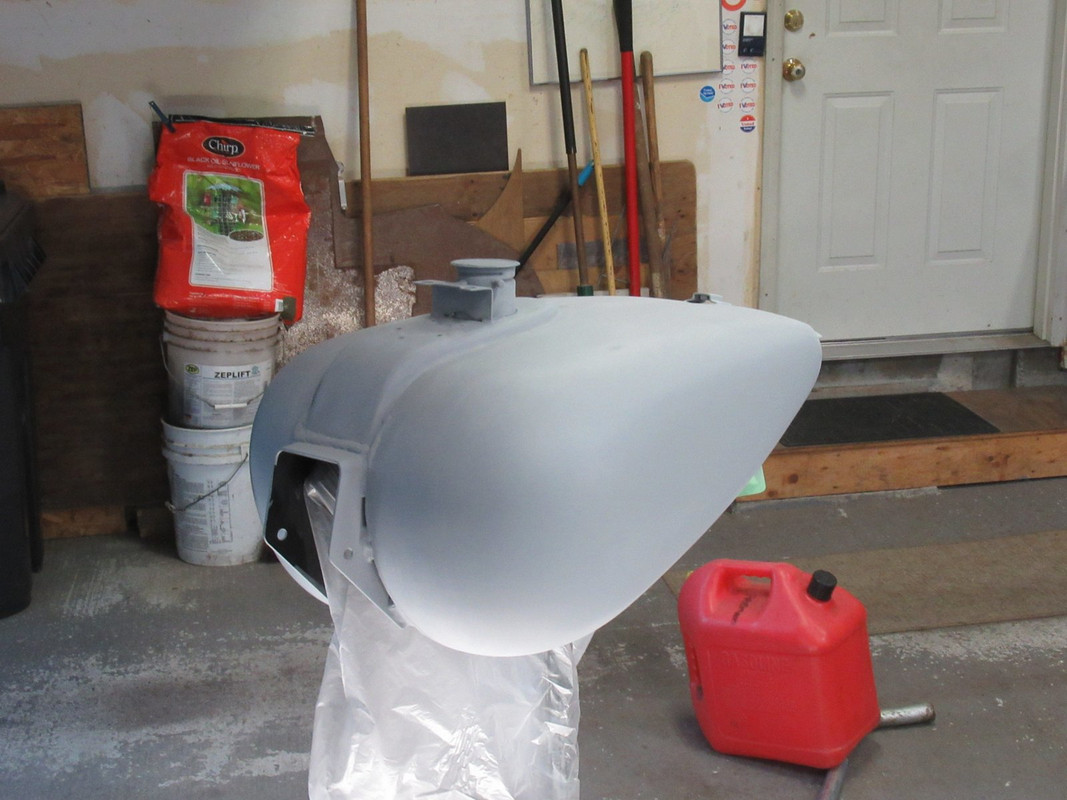
The repaired parts of the tank got three more coats of high build primer to perfect the finish. I'll sand them out in a couple days, and the tank will be ready too.
I sanded the tank all over with 220 grit on a flexible block. The side of the tank where the dent was repaired didn't look right, so I fogged a "guide coat" of cheap black paint and lightly blocked it with 220 grit on a long board. You can see how the repair wasn't perfectly smooth, the lighter areas are where the sandpaper removed the guide coat, and darker areas a little low. Keep in mind these are just a few thousandths off, but they would have been very noticeable under the final paint.
I sanded thru the primer with 80 grit and then another thin layer of body filler brought it back to where it should be. Then more sanding with the long board and flexible block.
I did one more layer near where I sanded down to bare metal, but didn't take a picture. So then, sand the fenders with the flexible block and 220 grit to remove any unevenness and orange peel from the primer. They are ready for the final coat of epoxy primer and then paint!
The repaired parts of the tank got three more coats of high build primer to perfect the finish. I'll sand them out in a couple days, and the tank will be ready too.
Last edited by Joe12RK; Oct 2, 2021 at 10:57 PM.
Thread Starter
|
Seasoned HDF Member
Joined: Jun 2012
Posts: 6,158
Likes: 2,565
From: CT/FL
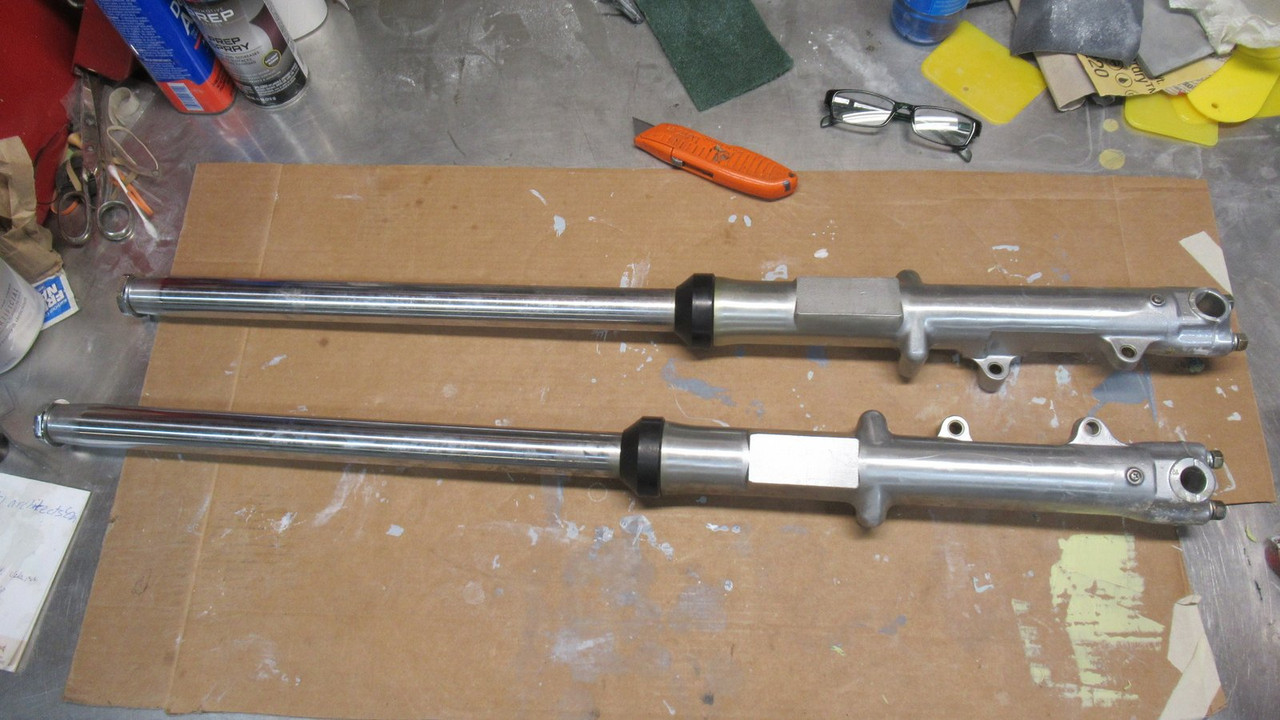
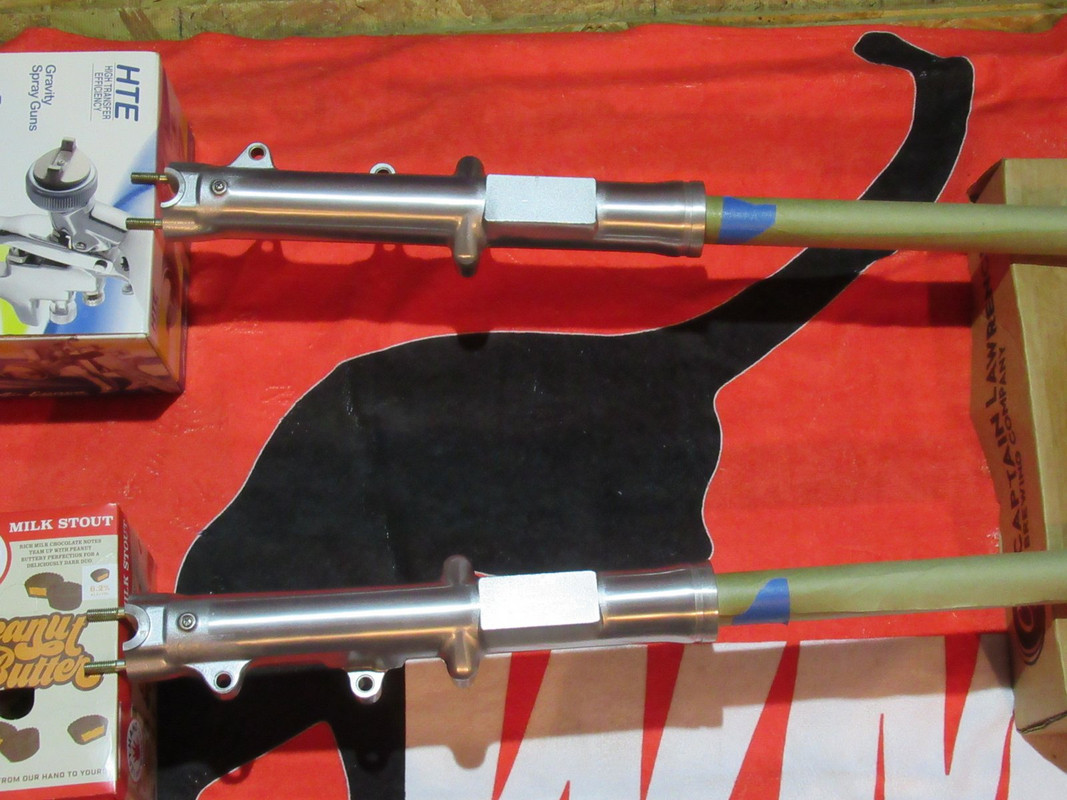
The NOS fork legs arrived, and they need some TLC. But knowing the internals are new justifies the work to clean them up. Today wasn't a garage day, but I wanted to show what they look like. I'll sand out the blemishes and re-clear the lowers. The tubes should just need a good degreasing.
Thread Starter
|
Seasoned HDF Member
Joined: Jun 2012
Posts: 6,158
Likes: 2,565
From: CT/FL
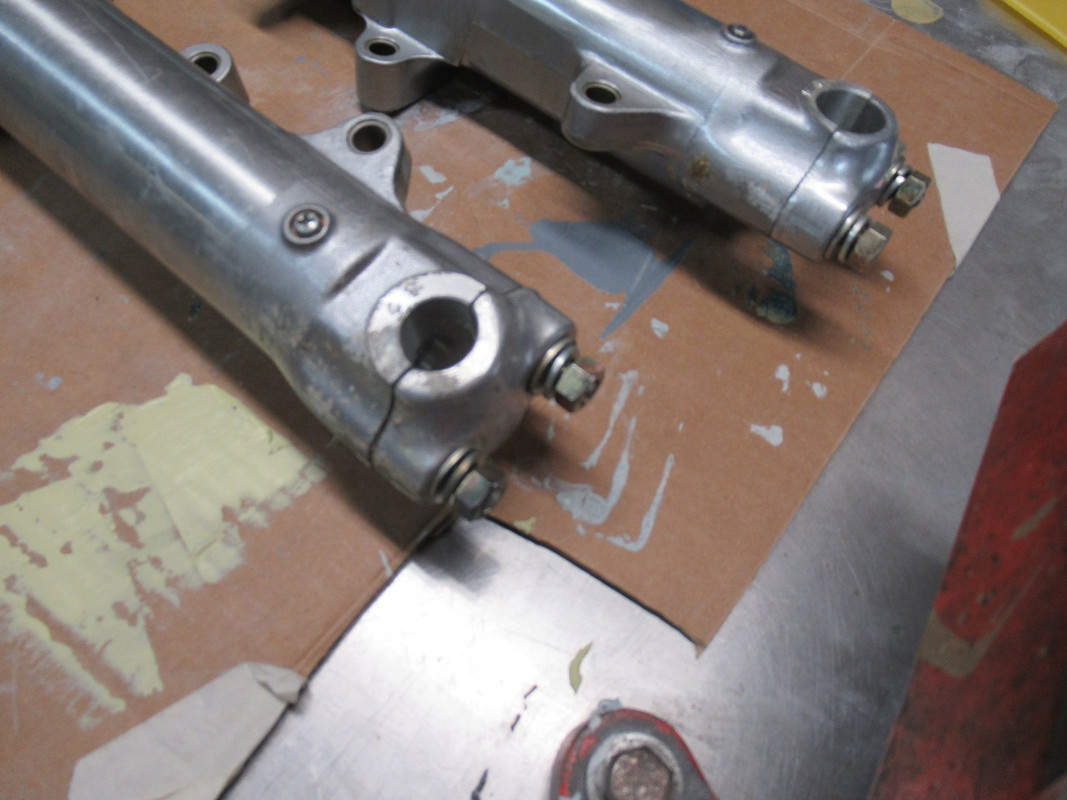
New Old Stock Showa Fork Assemblies
Two inch longer forks. The longer tubes part number 45644-77 are used on 82-up FXRs as well as 77-82 FXS and Sturgis models.
Two inch longer forks. The longer tubes part number 45644-77 are used on 82-up FXRs as well as 77-82 FXS and Sturgis models.
Thread Starter
|
Seasoned HDF Member
Joined: Jun 2012
Posts: 6,158
Likes: 2,565
From: CT/FL
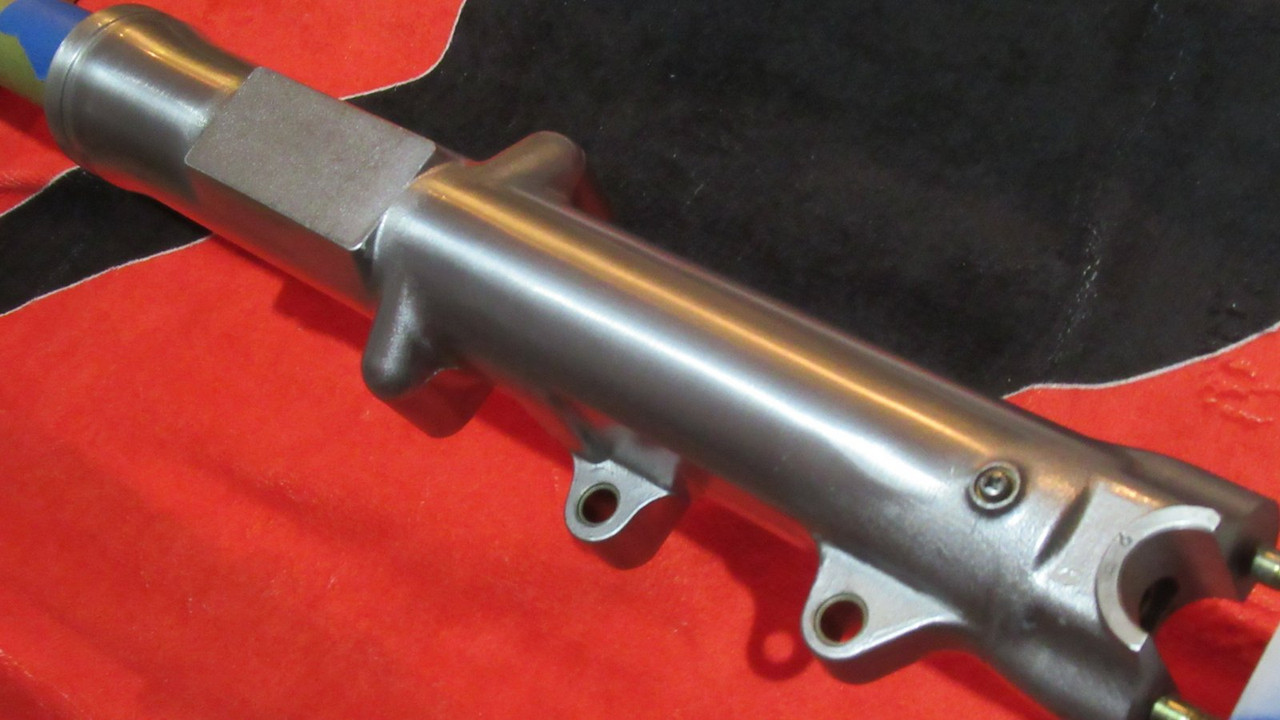
Wow, I am so happy today. Wasn’t sure how the forks would come out, but they came out great! The issue is there are shiny areas and rough cast areas, and I didn’t want to ruin either. First I experimented on the axle caps, they had some oxidation and I went to my go-to wire wheel to remove. It did a good job but left a dark stain. I sanded one with 400 grit paper, and the other with a green scrub pad to clean them up, and sprayed with my Napa TEC acrylic clear:
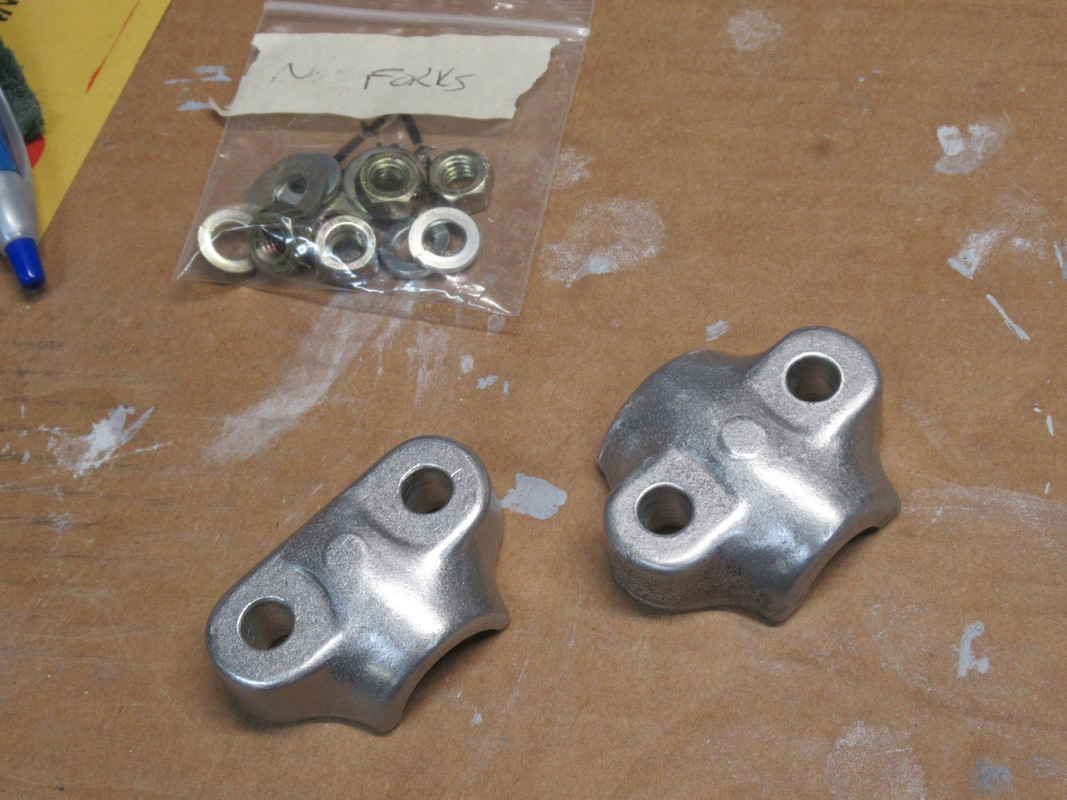 The scrub pad one on the left came out better, so that was going to be my approach. You can also see the NOS gold anodized fasteners, you can’t get them any more.
I cleaned everything with acetone first, and that started removing the factory clear coat. Perfect, because it left the original finishes that I can match after repairing the scratch marks and oxidation spots. Green pad was too rough on the shiny areas, it left more scratches, so I went to the hardware store and came back with a brass wire wheel and a fine white scrub pad. The wire wheel left scratches but the scrub pad didn’t do anything on the issues. Looking at the factory shiny areas, there are fine sanding marks, so first I tried 400 grit, and that removed the stains, but was too coarse. 600 grit was closer, but 1000 grit was just right. You can see what I mean by rough and smooth areas.
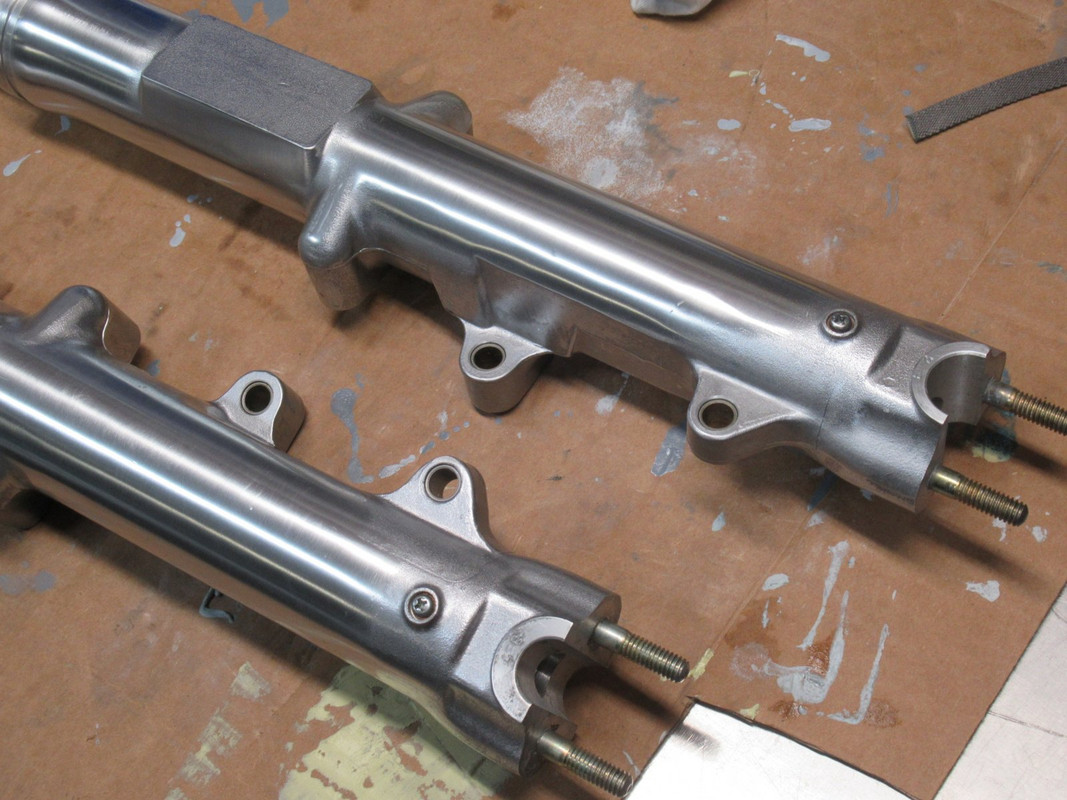
Once more with the white scrub pad and lacquer thinner, mask the tubes and spray with clear:
As I said, I am very happy with how they came out. Maybe tomorrow I can assemble them onto the bike.
The scrub pad one on the left came out better, so that was going to be my approach. You can also see the NOS gold anodized fasteners, you can’t get them any more.I cleaned everything with acetone first, and that started removing the factory clear coat. Perfect, because it left the original finishes that I can match after repairing the scratch marks and oxidation spots. Green pad was too rough on the shiny areas, it left more scratches, so I went to the hardware store and came back with a brass wire wheel and a fine white scrub pad. The wire wheel left scratches but the scrub pad didn’t do anything on the issues. Looking at the factory shiny areas, there are fine sanding marks, so first I tried 400 grit, and that removed the stains, but was too coarse. 600 grit was closer, but 1000 grit was just right. You can see what I mean by rough and smooth areas.
Once more with the white scrub pad and lacquer thinner, mask the tubes and spray with clear:
As I said, I am very happy with how they came out. Maybe tomorrow I can assemble them onto the bike.
Seasoned HDF Member


Joined: Nov 2006
Posts: 12,878
Likes: 5,449
From: la la land jerzey
Earlier this year we sold a 76 an FX for 12,000 but it had 20,000 original miles and scored 99.7 AMCA judging as OEM original - hated it as it is brown not my color
HD Forum Stories
The Best of Harley-Davidson for Lifelong Riders

7 Surprising Harley-Davidson Products that Are Not Motorcycles
Verdad Gallardo
8 Best Harley-Davidson Motorcycles Ever
Pouria Savadkouei
10 Worst Harley-Davidson Motorcycles Ever
Pouria Savadkouei
Killer Custom's Jail Break Is The Breakout That Refused to Blend In
Verdad Gallardo
Crazy Bunderbike Build Looks Amazing, But Is It Impossible to Ride?
Verdad Gallardo
Harley-Davidson Reveals Super Cool Cafe Racer Concept
Verdad Gallardo
Engraved Rebellion: Inside Bundnerbike's Glam Rock II
Verdad Gallardo
10 Motorcycles You Should Never Buy
Joe Kucinski
10 Things Harley-Davidson Needs to Fix in 2026
Verdad GallardoThread Starter
|
Seasoned HDF Member
Joined: Jun 2012
Posts: 6,158
Likes: 2,565
From: CT/FL
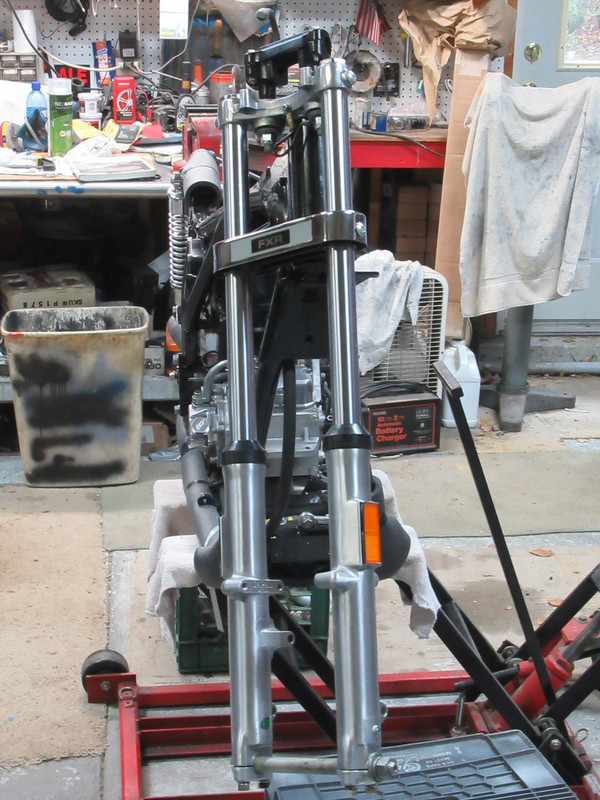
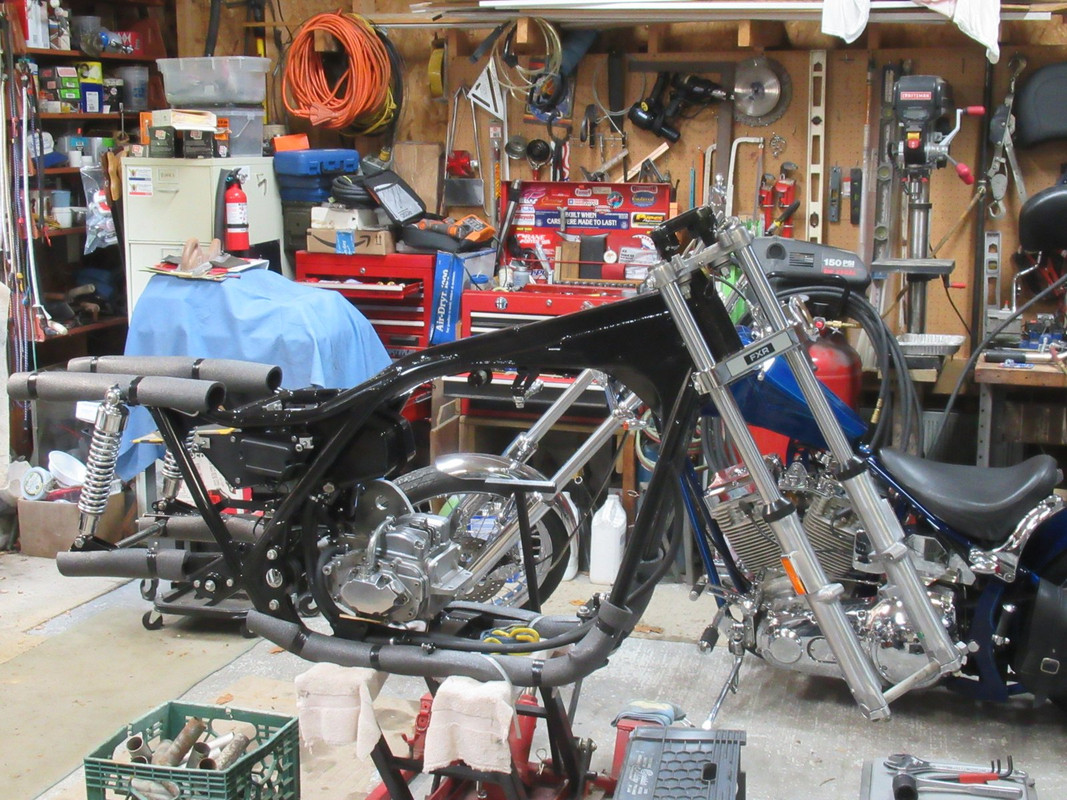
Another milestone reached, its looking like a bike now!
After sticking new reflectors on, the top nut removed, and the tube tightened into the lower tree, I used this to help install the top nut:
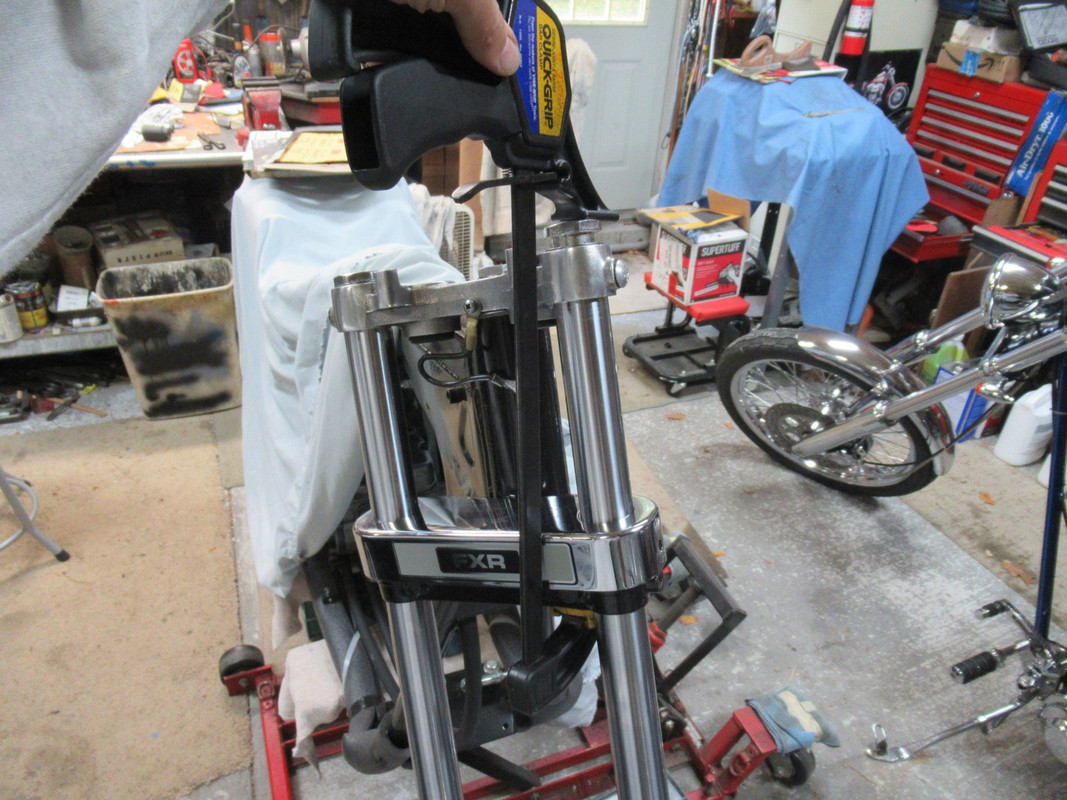
Snug the top nut, loosen the lower tree nut and tighten the top nut before torquing the lower tree. Install the axle and it’s done! The forks even came with oil.
After sticking new reflectors on, the top nut removed, and the tube tightened into the lower tree, I used this to help install the top nut:
Snug the top nut, loosen the lower tree nut and tighten the top nut before torquing the lower tree. Install the axle and it’s done! The forks even came with oil.

Stellar HDF Member


Joined: May 2018
Posts: 2,172
Likes: 435
From: australia