



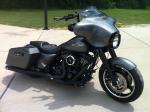



Air ride installed...
Advanced
Joined: Jan 2011
Posts: 55
Likes: 0
From: North Dakota

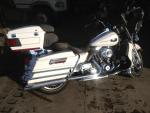
After reading this forum I decided to install this air ride. Initially, solo riding was great after I got the pressure dialed in and I did like being able to slam it while sitting. After I installed a pressure gauge in the dash and dialing it in for the wife and I, I saw the pressure was over 180 psi fully loaded. Anything less and the ride was horrible and after hearing issues about the swingarm hitting at full extension I have ordered the premium touring shocks. I wasn't comfortable at those pressures and worrying about component failure on my system. It's not for me but many of you like it so good luck to you.

Novice
Joined: Apr 2010
Posts: 24
Likes: 0
From: wisconsin
gabriel shocks
drummin, the fleabay ad has the same problem everybody is wrestling with here - the extended length is 14". anything over 13-1/4" will hit the muffler and/or axle nut. I have been holding back posting my experience because I have not had a chance to ride since I made the change but after seeing the interest here I'll throw out what I have done so far. For anyone thinking about shortening the shock as I did, you need to have a clue about how the shock is put together internally or saw it apart to see (I didn't understand it and that is why I deleted my post a while back, thinking I was giving out false info). Here's the deal; the top extension rod is internally tied to the bottom air chamber (you can check this out by clamping one eye in a vise & pushing/pulling the upper & lower shock body). So, if you reduce the length of the rod by 1" you reduce the max overall shock length from 14-1/4" to 13-1/4" even though you can't see it - you have to measure. Also, when you shorten the top rod, I'm guessing it no longer bottoms internally, which is why I added the external bumper on the rod before re-welding the rod to the top eye. (Wolfman, the bumper is from McMaster-Carr part# 9732K12). Some other details for anyone who tries this: I cut the rod off the top eye and then cut 1" off the rod. Next I drilled a 1/2" hole in the eye opposite the original friction weld and TIG welded the rod to the eye from the inside & outside (the rod is probably high-carbon & for sure high-chrome - thus TIG). Also, beating the rubber bushings in & out was very difficult until I applied dishsoap - then I did it by hand. Perhaps silicone spray would have been better since the dishsoap swelled the rubber so the metal sleeves would no longer fit in the bushings. I solved this by leaving them out and using a 5/8" x 1-3/4" shoulder bolt with 1/2"-13 thread (also McMaster-Carr) for the bottom eye and for the top eye a regular 1/2"-13 hex head bolt longer than required so the threads will bottom out in the frame boss before squeezing the rubber bushing too much (I used washers as needed to get things to fit up snugly). Now, to find the sweet spot on the air...........
Tourer
Joined: Nov 2009
Posts: 447
Likes: 1
From: Salem NH 03079
Can someone please re-post the diagram for this install... I have all my parts ready to go. Shocks are installed, have my compressor, dump, fittings, relay and 2 hot wires that I want to use off my FLHTP hand controls.
Siren button will dump air on the left bar and the passing light button will turn the compressor on - on the right control. I removed my passing lights to install SG signals, I also like the idea of using this button for the compressor because the "P'' light, lights up on the dash so I will know if it is running while riding.
Please help, looking to get this done today!!!

Not looking like a police bike much anymore...


Siren button will dump air on the left bar and the passing light button will turn the compressor on - on the right control. I removed my passing lights to install SG signals, I also like the idea of using this button for the compressor because the "P'' light, lights up on the dash so I will know if it is running while riding.
Please help, looking to get this done today!!!
Not looking like a police bike much anymore...
Tourer
Joined: Nov 2009
Posts: 447
Likes: 1
From: Salem NH 03079
Im just not understanding how to tie the relay into the system??? I have a 5 wire relay, 20/30a... I assume I need the relay due to running the compressor off the siren button of my bike?
I am sitting here stumped and getting nothing accomplished.

I am sitting here stumped and getting nothing accomplished.
Tourer
Joined: Apr 2011
Posts: 269
Likes: 0
From: Randolph, WI
Here's my diagram of a mounting plate that I copied from Duraglide. I drew out roughly where everything was being mounted. Here's how I wired mine. 87 for your compressor. 85 ground. 30 is positive on the battery. 86 for the switch to turn compressor on. For your dump you'll have to feed in to the positive on whatever button you choose. Then ground the negative of the dump. Hope this helps.


HD Forum Stories
The Best of Harley-Davidson for Lifelong Riders

7 Surprising Harley-Davidson Products that Are Not Motorcycles
Verdad Gallardo
8 Best Harley-Davidson Motorcycles Ever
Pouria Savadkouei
10 Worst Harley-Davidson Motorcycles Ever
Pouria Savadkouei
Killer Custom's Jail Break Is The Breakout That Refused to Blend In
Verdad Gallardo
Crazy Bunderbike Build Looks Amazing, But Is It Impossible to Ride?
Verdad Gallardo
Harley-Davidson Reveals Super Cool Cafe Racer Concept
Verdad Gallardo
Engraved Rebellion: Inside Bundnerbike's Glam Rock II
Verdad Gallardo
10 Motorcycles You Should Never Buy
Joe Kucinski
10 Things Harley-Davidson Needs to Fix in 2026
Verdad Gallardo
Tourer
Joined: Nov 2009
Posts: 447
Likes: 1
From: Salem NH 03079
I decided to just be a man and tackle it myself today. I just didn't have a diagram in front of my for the relay. It's been a while and I forget what which wire does. I found this link in the thread: http://thecustomconnectiononline.com...8d65bc9bca82b5
Now I am all set, air ride installed an complete. Running the compressor off my passing light switch and dumping air off the siren. Very happy as of right now.
Now I am all set, air ride installed an complete. Running the compressor off my passing light switch and dumping air off the siren. Very happy as of right now.